
Now she gets to do two things she loves, write and use her music knowledge to enrich other musicians’ lives and help them follow their musical dreams! When she’s not delving into the music world, she spends time writing for various niches like beauty, style, and pet care!
- How to Learn to Play Cello Guide: The Only Guide You Need to Get Started - April 18, 2022
- How to Find the Best Trumpet Tuner - April 14, 2022
- Best Carbon Fiber Violins Guide: Why You Need the Glasser Carbon Composite Violin - April 13, 2022
So, I heard you want to learn how to play the cello.
Google shared your secret with me: that’s how we ended up here together on this guide.
But, yay, huge congrats on your decision to learn how to play the cello.
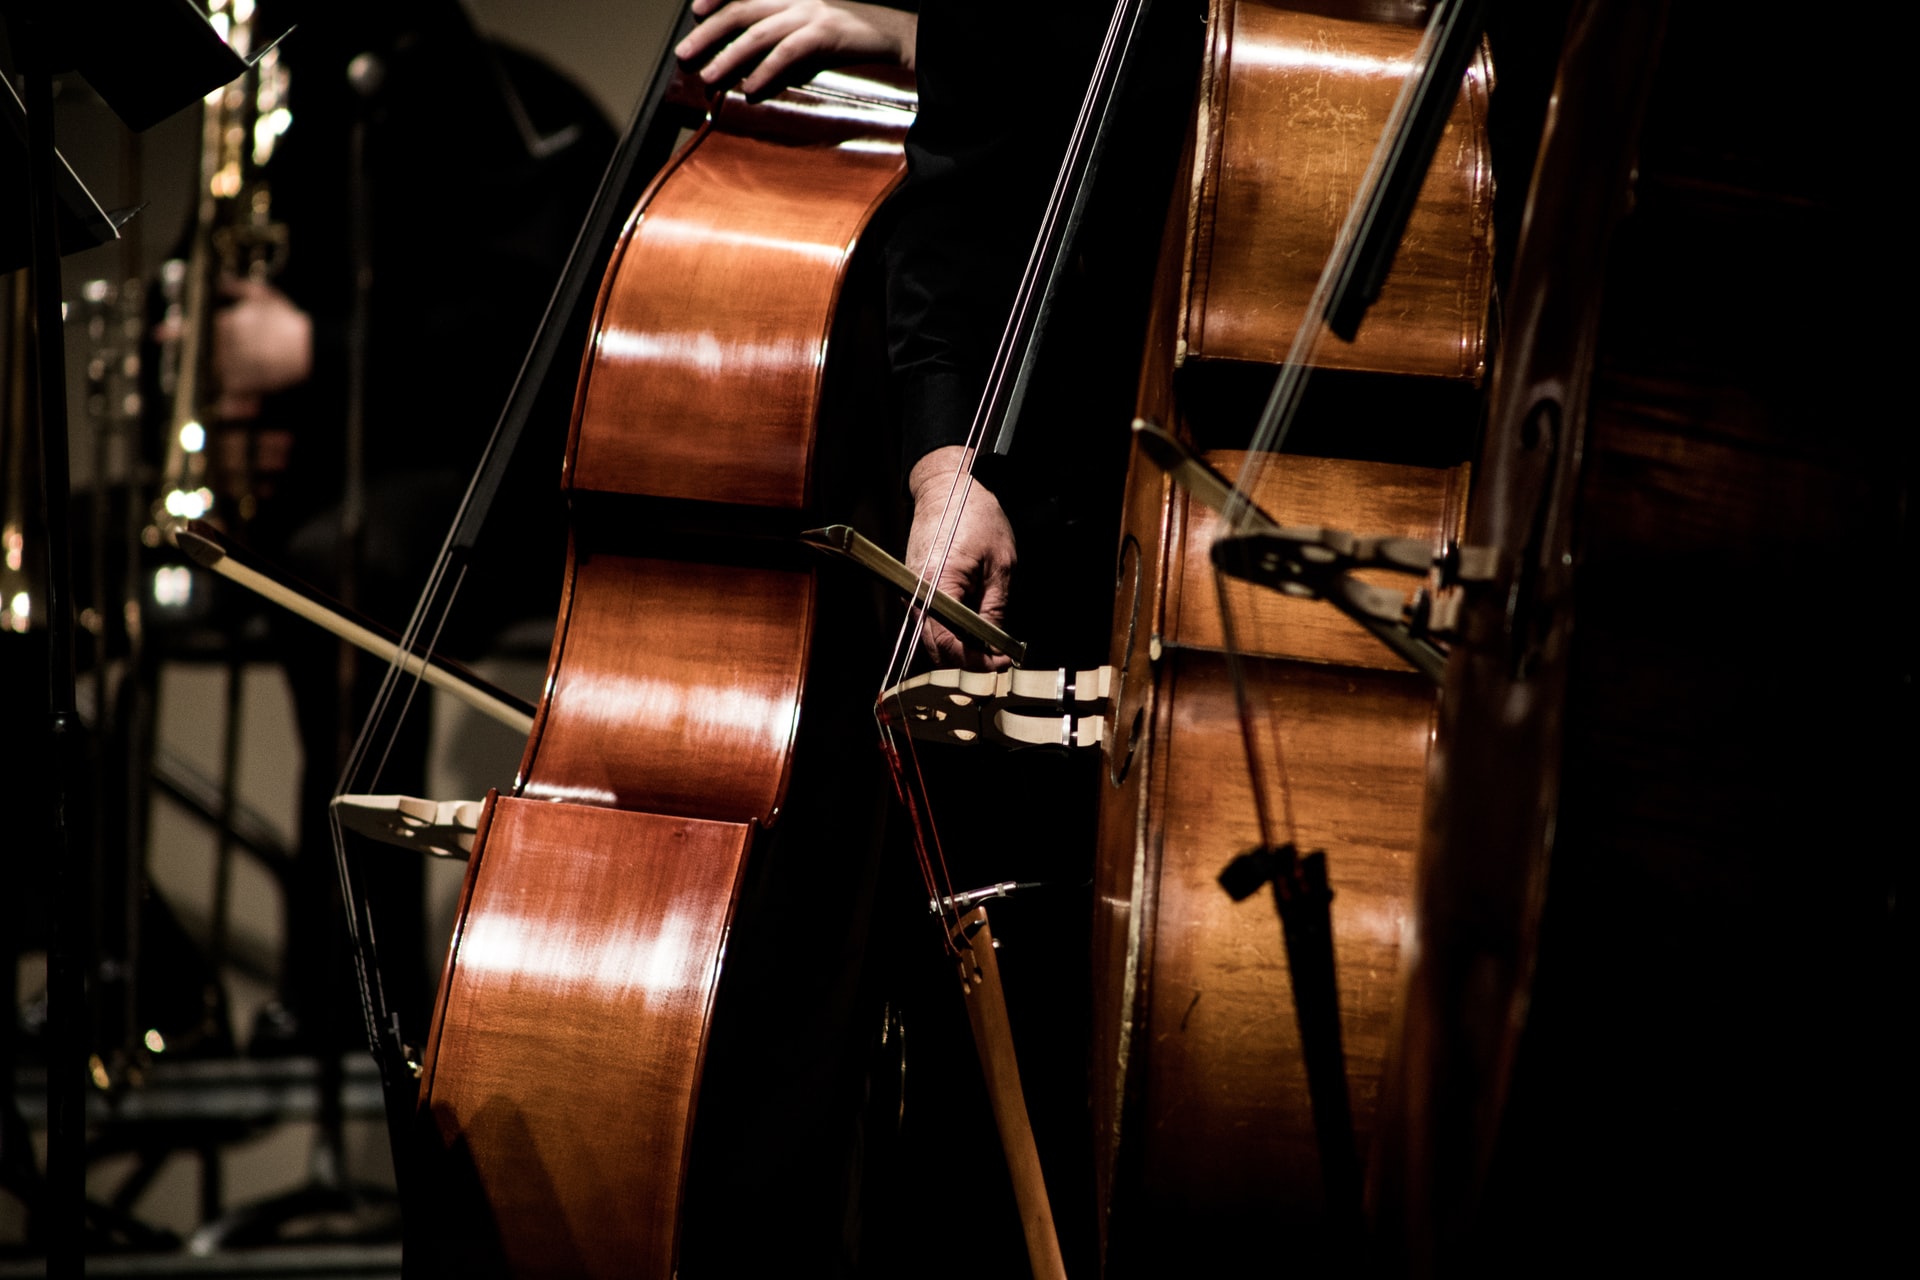
In my opinion, the cello is the most beautiful stringed instrument out there. There’s not one other stringed instrument that I love more than the cello. And while I do agree that playing the cello is a rewarding experience, there’s just something about the way I connect with the instrument. Personally, I would much rather learn how to play the cello over again than any other stringed instrument.
My music journey started out on the flute, but I fell in love with music so much that I decided to learn how to play basically any instrument I could get my hands on. So switching from the flute to the cello was a massive hurdle (to say the least), but I’m here! And even better, I’ve learned how to play the cello so well that I’m actually here to help you learn how to play too.
I don’t want to keep you from your instrument for too long. Let’s hop right in!
Figure Out the Cello Size You Need
Before you purchase your first hello, it’s really important for you to determine what size cello you need. There are a lot of different size options available so figuring out what size would be best suited to your body (or your child’s body) is important for you to be successful as you’re learning.
If you purchase the wrong sized cello, it can make a big difference end the development that’s made while learning how to play.
If your child is learning how to play the cello starting around 2, I would only recommend a 1/4 sized cello. When your child reaches ages 4 or 5, you can move them to a 1/2 size cello. Once your child reaches their mid to late teens, you could always move them up to a full-size cello. There is the option of a 7/8 size cello, but this is really only something I would recommend to anyone who has smaller fingers. This isn’t really a commonly found option, but it still is something that’s available to those who need it.
Get Yourself a Cello
Next, after you figure out what size cello you need, you’ll need to buy your first cello. You can buy a brand-new cello, or you can buy a used cello. You can even rent a cello if you aren’t sure they’re going to stay committed to playing. The choice is really up to you. Personally, I would recommend that you buy a beginner-friendly cello and not rent or buy a used cello.
A lot of people will think that buying a brand new cello is expensive, and there is some truth in that. Buying a brand new cello is expensive if you’re buying an intermediate or professional level instrument. However, if you’re buying a cello that’s beginner-friendly, it’ll be much friendlier to your budget.
I would recommend staying away from used instruments. You never know if the cello was properly cared for before you got your hands on it. If the cello isn’t properly cared for, there are going to be small maintenance issues with the instrument that will drastically impact its playability of it.
This means that learning how to play on a used cello can get frustrating if things aren’t working the way they’re supposed to. Buying a brand new instrument means you don’t have to worry about the mileage or lack of maintenance on your instrument. You’ll know your cello will be in perfect working condition and know that there aren’t any minor (or major) defects that would inhibit your ability to play.
Also, remember that your cello doesn’t have to be perfect. Even if it’s not your dream instrument, it still should be friendly towards you as a beginner. You could always work towards buying your dream cello once you become more advanced. As long as your current cello is perfect for you and your needs as a beginner, that’s all that should really matter.
In the best advice that I can provide, I would make sure to go and store before committing to one cello. It would be really important for you to try out different sizes of cellos from different brands, especially as a beginner. Trying out different cellos in the store will allow you to feel what you specifically like and don’t like in different cello models.
A lot of established music stores will have some sort of practice room to allow you to hold and play the cello for the first time. Depending on the music store that you’re buying from, you can even ask to take the cello home for a few days to try it out. Don’t hesitate to ask; the worst that you can be told is no. If you decide that you don’t like the cello that you take home with you, you don’t feel pressured into buying it. You really want to make sure your cello is a great fit for you.
With all of that said, here are some beginner level cellos I would highly recommend:
Cecilio CCO-100
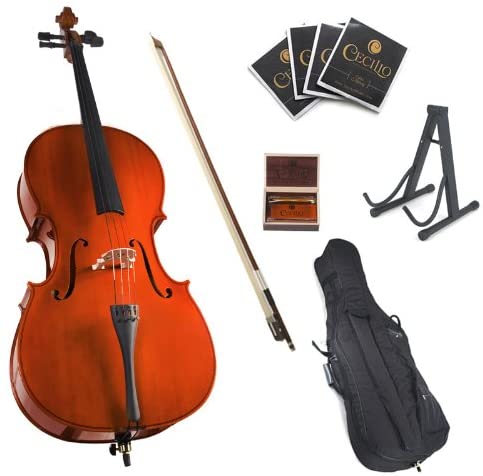
This is a really great beginning cello because it’s offered and so many different sizes and colors. You can buy this beginner cello in ¼, ½, ¾, or 4/4 sizes. I think this is a great cello for anyone who has a smaller body, including children. The total weight of the full-size cello is 9 pounds. Plus, this cello comes with a 1-year warranty that protects against any manufacturer’s defect, so it’s another great addition to have to keep you protected if you’re worried that you’re going to buy a lemon.
There are four different cello colors for you to choose from, which I think is a great option for anyone that has young children that are looking for something a little bit more fun and customizable. Plus, you aren’t just getting a cello with your purchase. You’re also getting a bonus and made with Mongolian horsehair, A cello case, additional strings, a stand, a bridge, and rosin. It’s really giving you everything that you need to get started, plus a little extra.
Yifente Electric Acoustic Cello

If you’re a beginner looking for something on the spicier side, why not try out the Yinfente Electric Acoustic Cello? This is a full-sized cello comprised of solid maple spruce wood. Plus, it comes with all of the accessories you need to get started playing the cello. You’ll find steel strings, a carrying bag, a bow, and rosin in with your purchase! Plus, there are three different colors to choose from. Personally, I love how stunning (and captivating) the blue color is. I need one for myself!
Cremona SC-175 Premier Student Cello
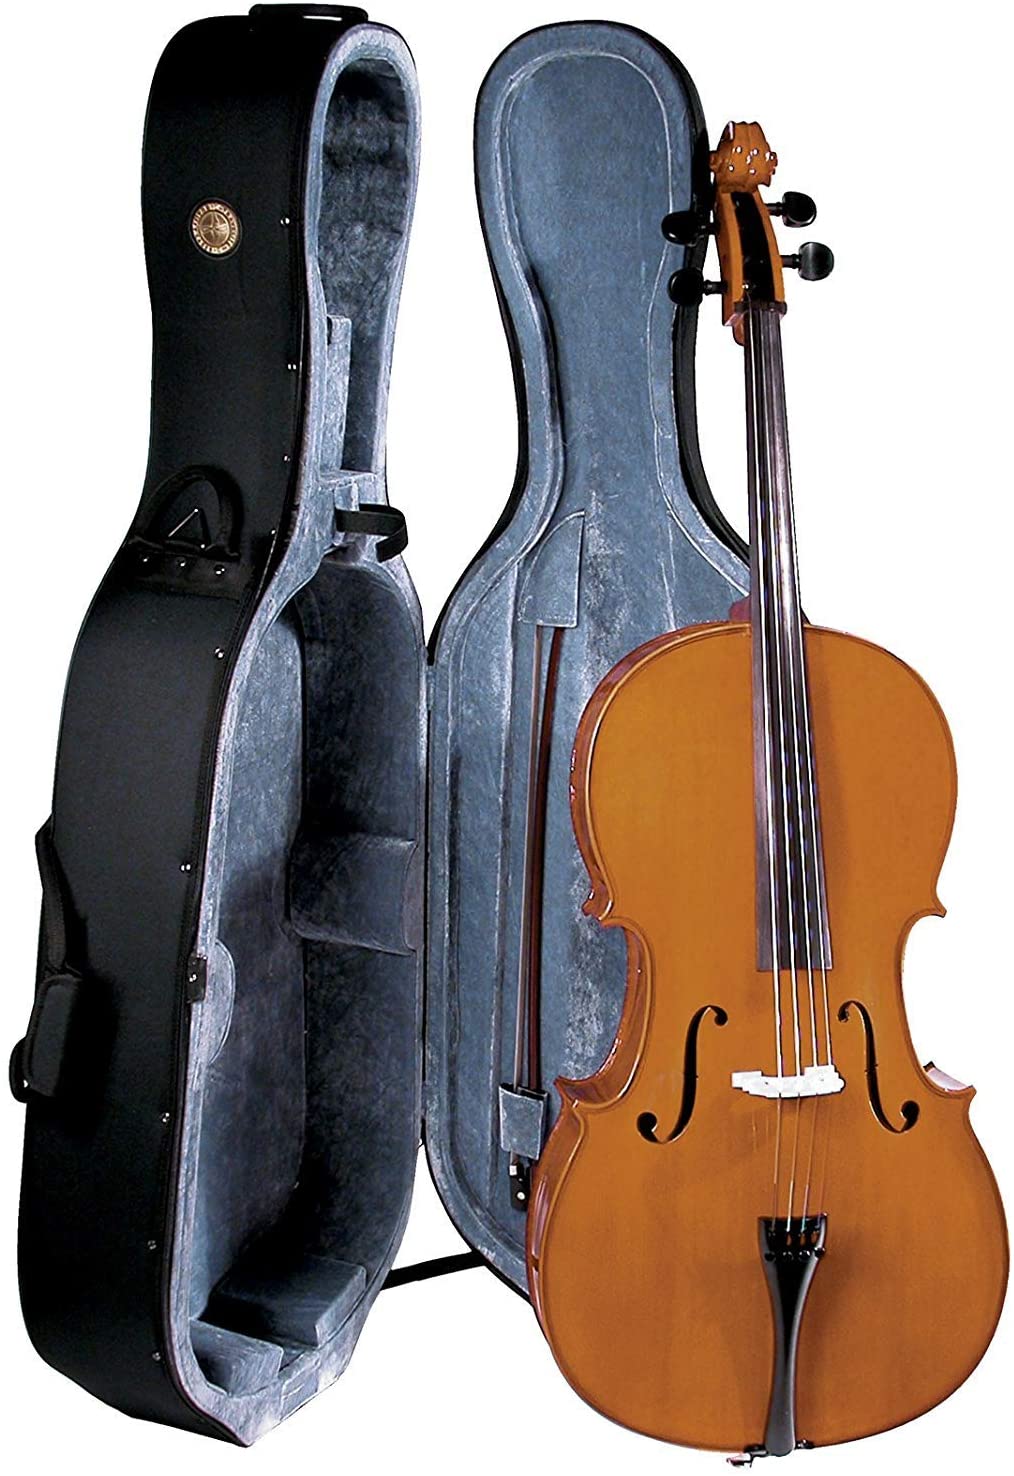
This is a great student model, so it’ll grow with you to an intermediate stage. This cello delivers great sound projection, but it does require more of a financial commitment than the other options on this list. That’s because you’re going to need to get another bow to actually play this cello. The bow that comes with this cello is not good at all. But other than that, it’s a pretty good cello to get started on!
Don’t forget the additional accessories

Before you fully commit to playing the cello for the first time, I would also recommend that you get the additional accessories that you need. Most of the time, a lot of beginner kits will come with the accessories that you need to get started playing the cello. However, this isn’t always the case. You’ll also need a bow to get started playing.
I would also recommend you invest in rosin the help make your journey starting the cello a lot more successful. Rosin will help to create friction between your bow and your strings. Having the rosin will make it a lot easier for your bow to connect with your strings.
Lastly, I would also recommend that you get an endpin rest. The endpin is what’s placed on the floor for you to rest your cello onto.
A good tuner doesn’t hurt to have either, but it is absolutely necessary for you to begin playing. You could always download a tuner on your phone or use the tuner that comes in the beginner kits to start playing.
Plus, it’s always a good idea to have extra strings readily available. The last thing that you want to have happen is you accidentally break a string and aren’t able to immediately replace it in the middle of a practice session. I always recommended that you change out your cello strings around every four to six months. However, you should only change out your strings that often if you’re playing for at least an hour every day for five days a week. If you happen to be playing more frequently, change out your strings more often.
The material the strings are made out of is a huge factor in the sound your cello produces. If your cello strings are made out of guts, they will wear much faster than if you were using strings that are made from fabricated steel.
Your Cello Bow
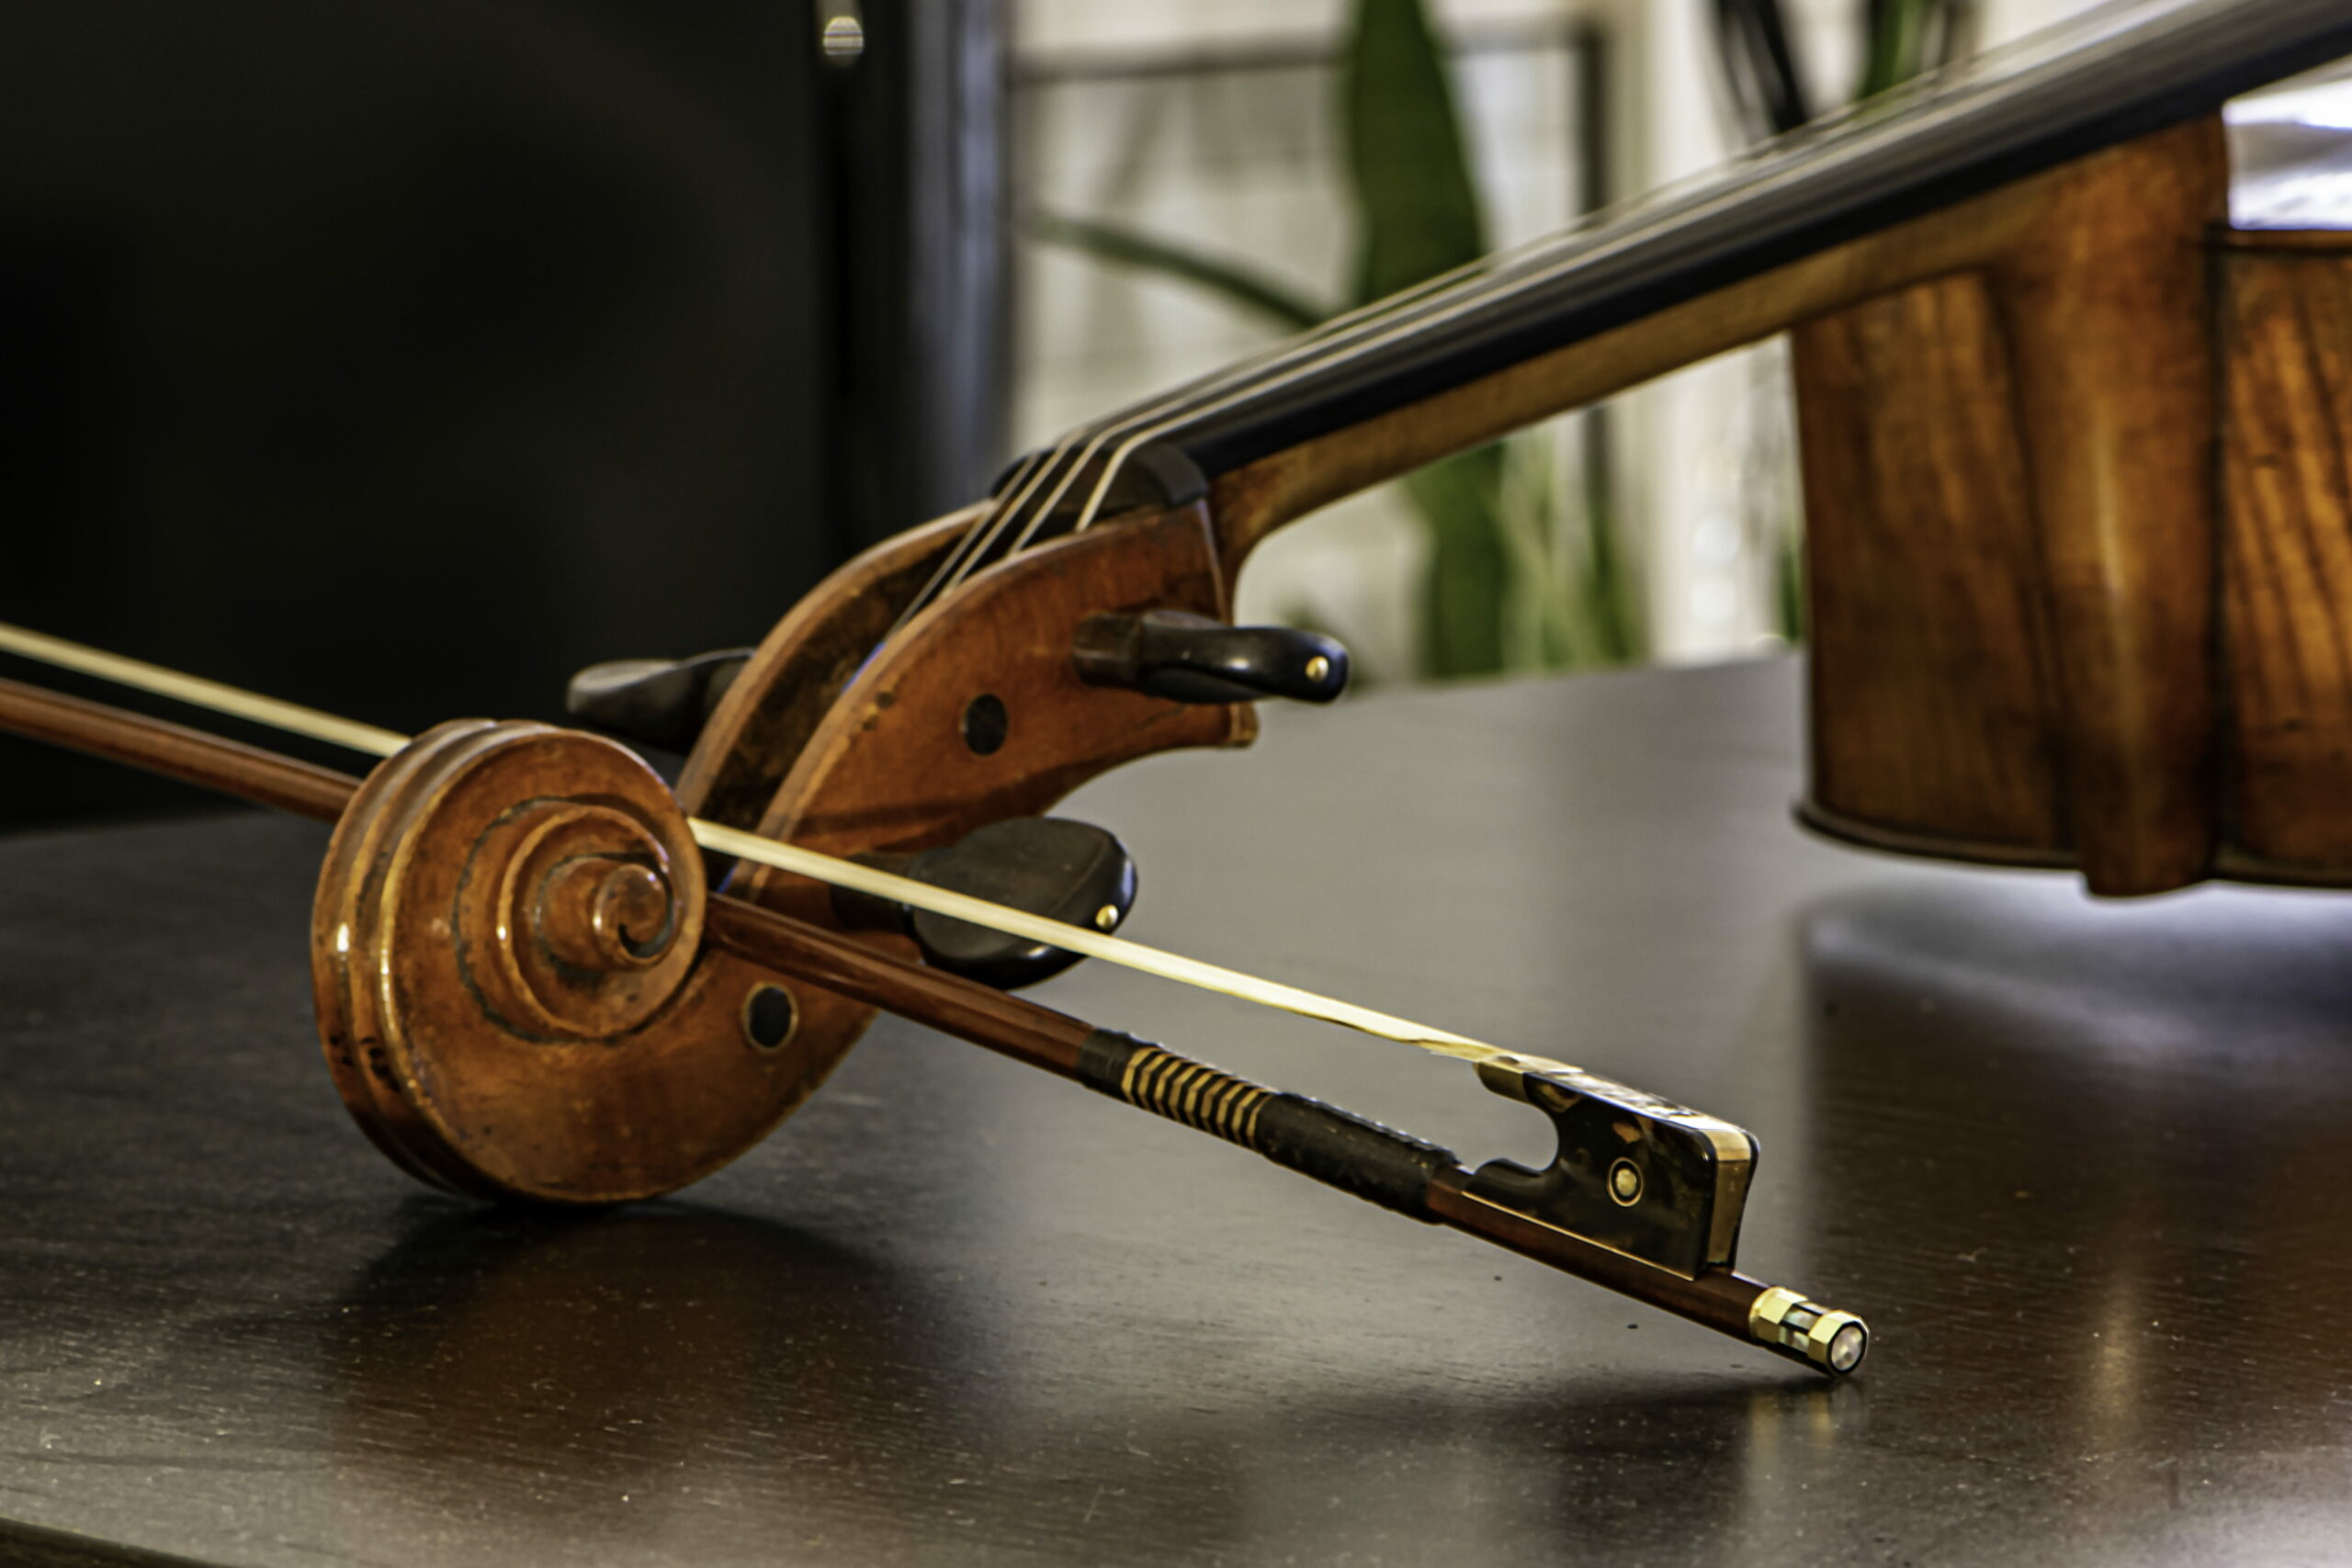
I wanted to make a separate section about the cello book because it’s honestly more essential to get the right fit for them your actual cello. While your cello does contribute to a huge portion of your overall experience playing, your cello bow is more important. If you don’t have a good cello bow, you will have a really hard time playing the cello. There are different prices that you can expect to pay for different levels of quality in a cello bow.
A good fool to go buy a spending 25% of what your cello cost you just on the bow alone. This is a great rule to keep in the back of your mind see, as it’ll help to ensure that you’re investing in a cello bow that matches the quality of your cello.
Plus, it’s also important to ensure that you’re investing in a cello bow that’s lightweight and flexible. If you buy a bow that’s too heavy or isn’t flexible enough, it’ll drastically impact your overall sound. This doesn’t necessarily mean that a stiff or heavy cello bow is bad. It will just give you a very different sound than what a lot of beginners expect to produce with their first cellos.
You could always go to a music store and test out different types of bows to see how the differences in weight and stiffness impact the sound that your cello produces.
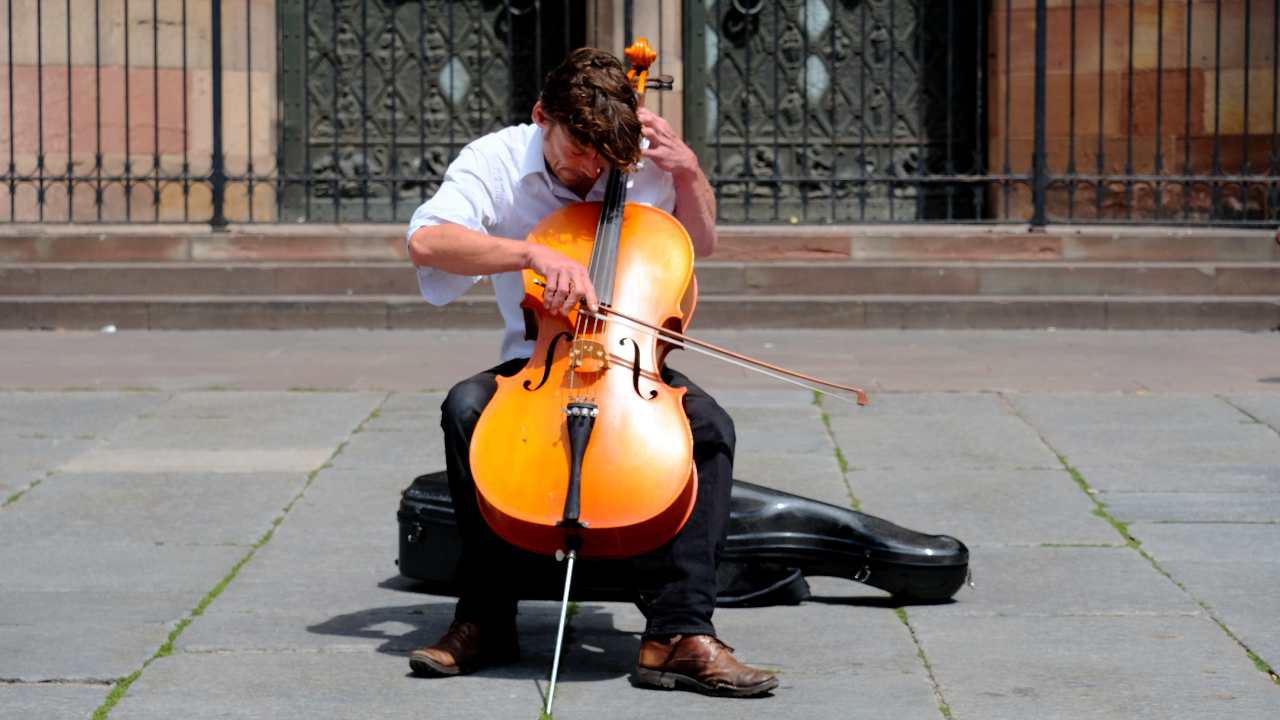
Getting Started
Now, we’re moving on to the fun part. Since you’ve gotten yourself a cello and all the accessories that you need to get started, you can actually start learning how to play the cello. I want you to keep in mind that the entire time that you’re practicing for the first time that getting the basics down is vital. If you don’t have a solid foundation of basics to lean on, the rest of your cello journey is going to be rocky.
Understanding how to properly hold the cello, how to properly make bow strokes, and understanding some very basic music theory or all the vital parts that you need to have under lock and key before you begin to study more advanced music.
Sit Properly
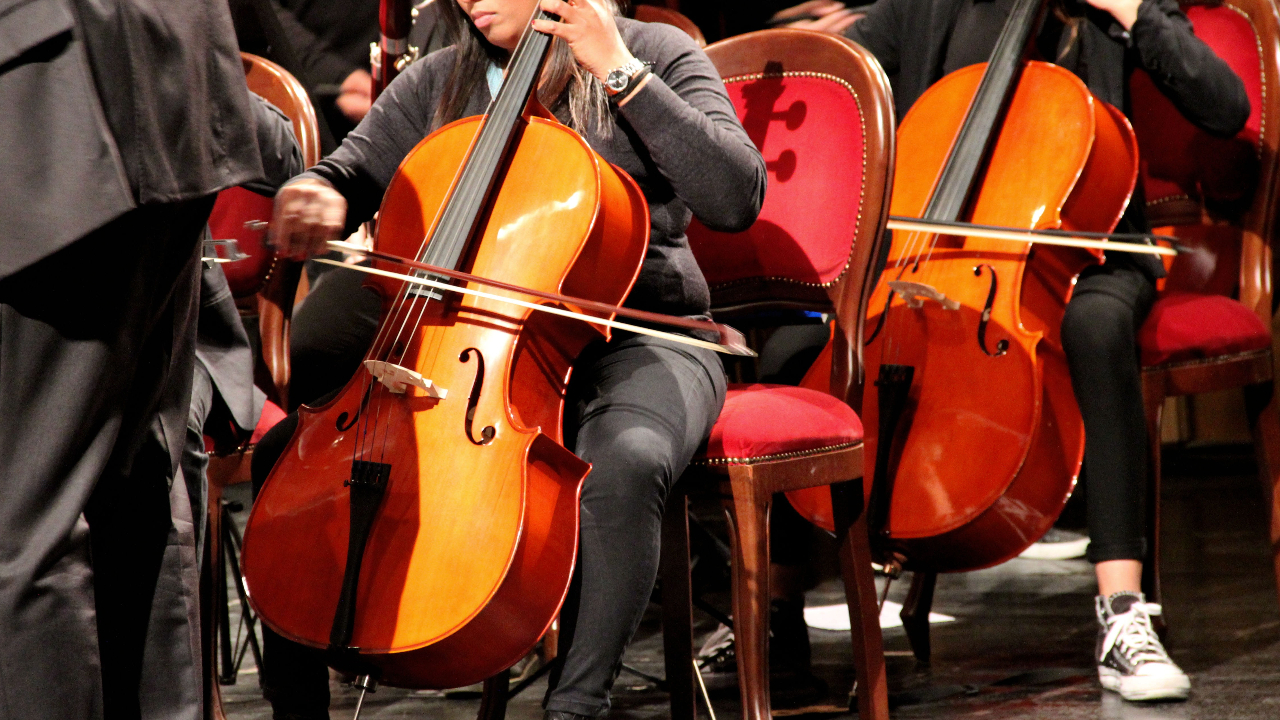
First, it’s very important that you can learn how to sit properly in your chair. A lot of people make the mistake of sitting back all the way in their chair when they’re first learning how to play. But, this isn’t the proper way to sit in your chair.
You need to sit yourself down on a firm chair. Personally, I think it would be best if you didn’t sit on a chair that had any padding. If you have a hard plastic chair or a wooden chair, I think this is the best type of chair for you to first learn how to sit on.
When you’re sitting down, you’re going to need to sit up completely straight. Your hips should be elevated a bit higher than your knees are. Imagine you have a string that’s located at the top of your head and is pulling you up words. Your stomach muscles should be engaged to keep your spine straight so that your lower back isn’t holding the entire weight of your upper body.
Keep Your Cello Balanced
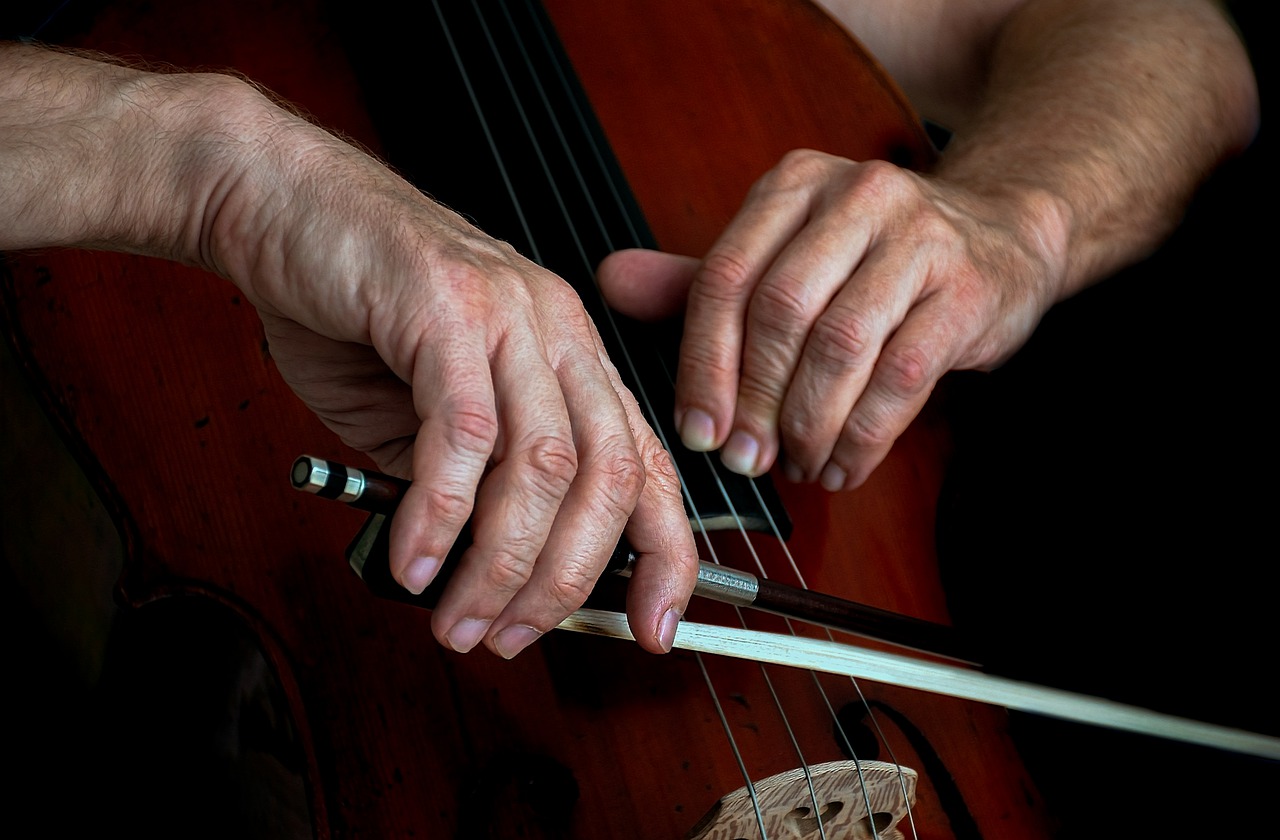
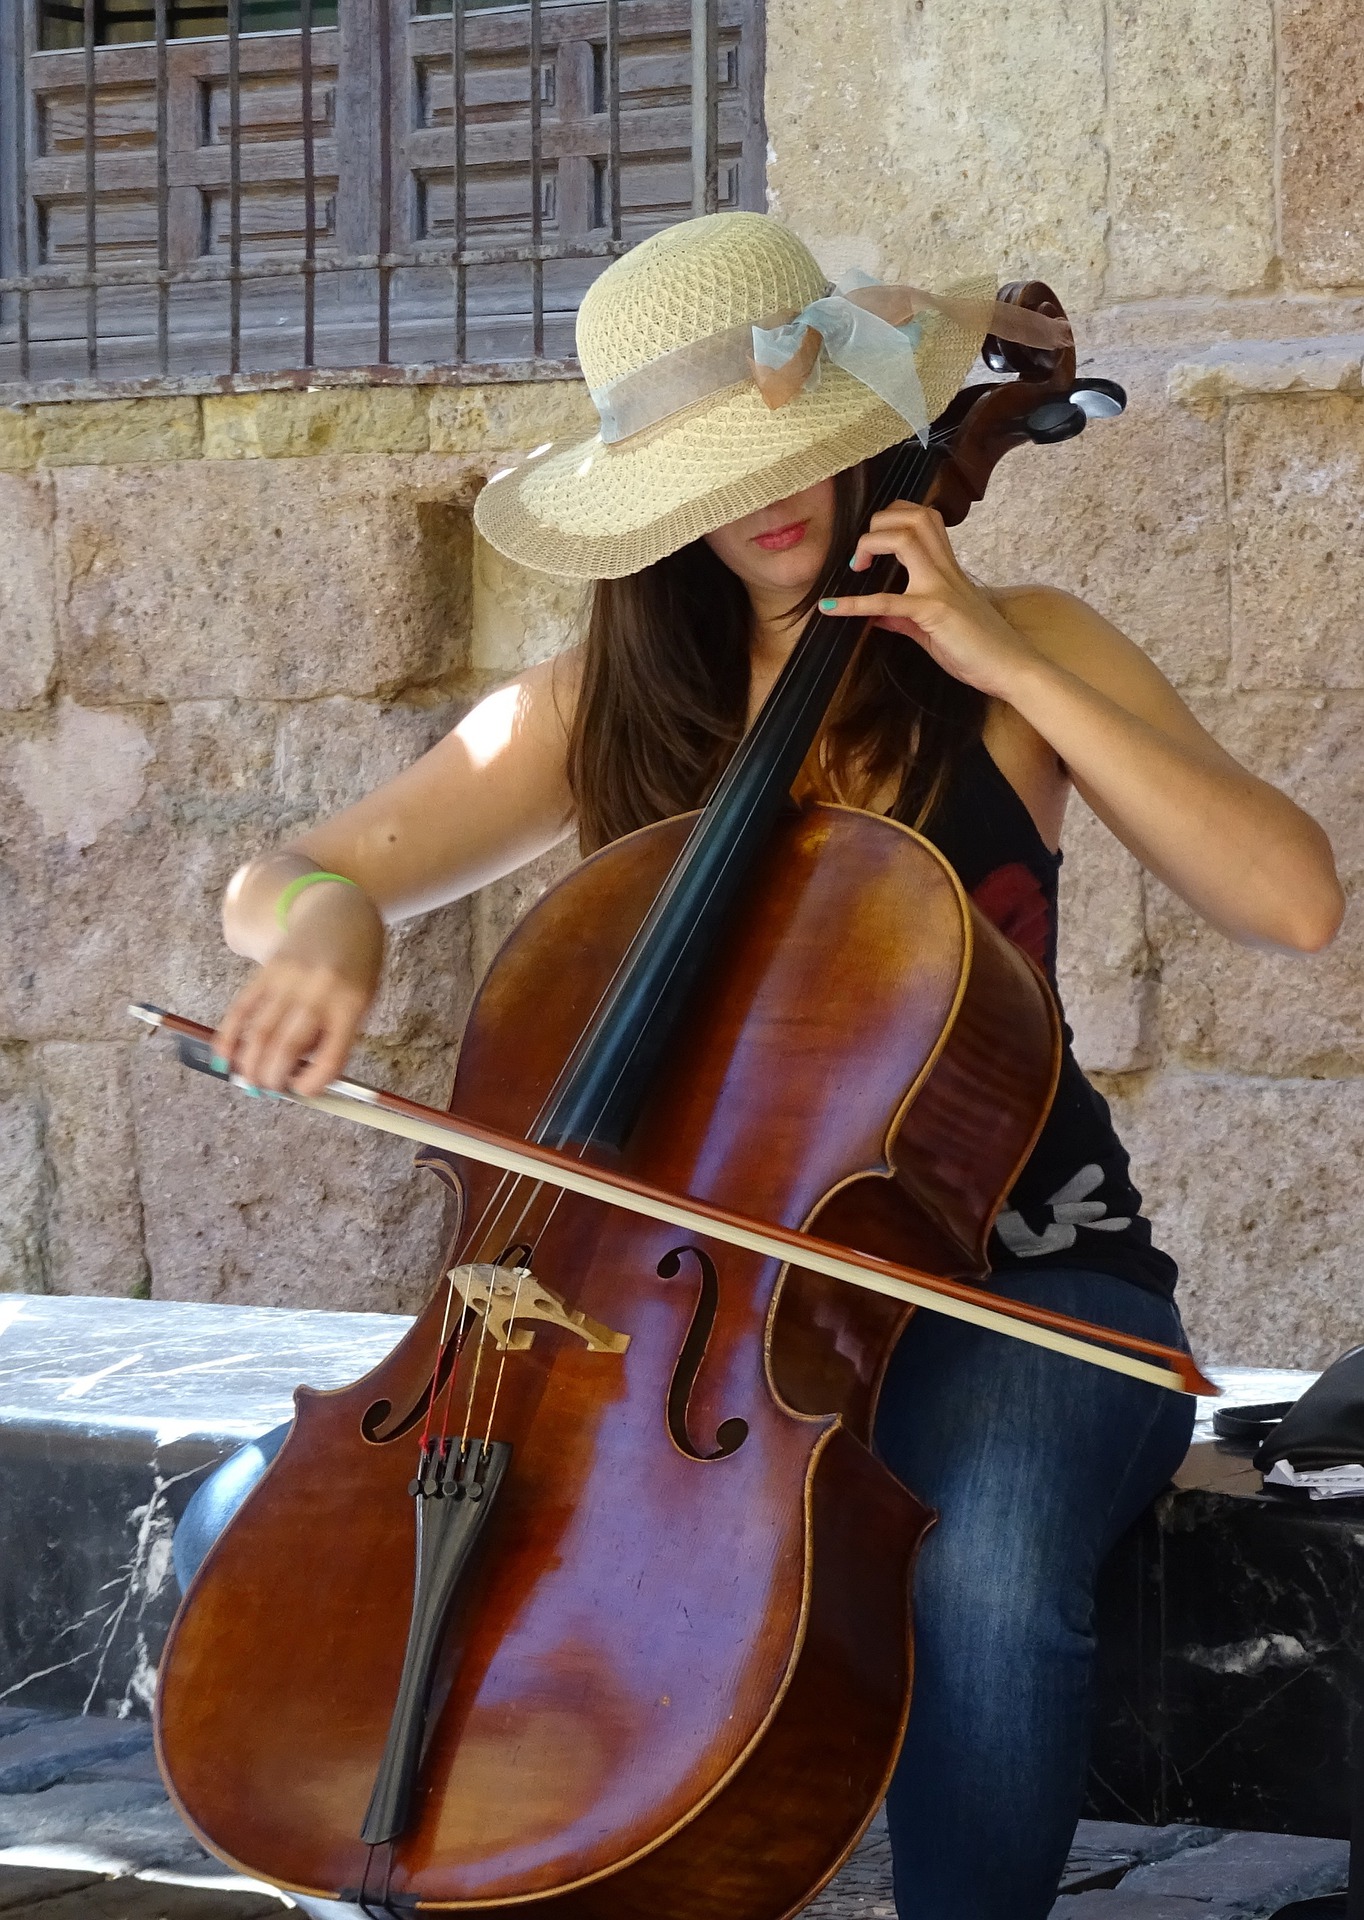
Next, it’s really important for you to make sure that you have your cello properly balanced on your body. That means you want to keep your knees spread apart to make sure that you have enough room for the cello to rest comfortably. Your cello should be sitting in front of you with the endpin resting on the floor. The rest of the cello should be resting on the sides of your knees. Make sure that the strings of the cello are pointed away from you as you’re holding the instrument.
A common mistake that I see a lot of beginners make is they try to hold onto the cello tightly with their knees. But, this isn’t what you should be doing. You should just have your knees resting against the size of the cello to keep everything supported. You shouldn’t be squeezing the cello in between your legs, as this can hurt both the sides of your needs and your hips. Also, make sure that the cello is evenly resting on both legs. You shouldn’t have one leg supporting more weight than the other.
Position the Cello Properly
After you’ve made sure that you have the cello properly balanced in between your legs, I want you to take a look at your chest. The body of the teller should be leaning back up against you and resting on your chest. The top part of the body should be comfortably weighted against your chest, and it shouldn’t be any pain or discomfort on your end.
If you find that the cello isn’t properly reaching the height of your test, it means that you’re going to have to adjust the endpin. You can loosen up the screws that connect the endpin to the cello to make the endpin taller or shorter for it to properly rest against your chest.
Next, you want to make sure that the cello is properly angled on your body. You shouldn’t have the neck of the cello touching against your neck. Instead, the cello should be located to the left of your head with the cello leaning back. You should be able to hold on to the neck with your left hand and have your right hand comfortably resting somewhere near the strings of the cello. Even if your left hand is your dominant hand, there isn’t a left-handed cello option. You’ll still position the cello in the same way.
Start Tuning
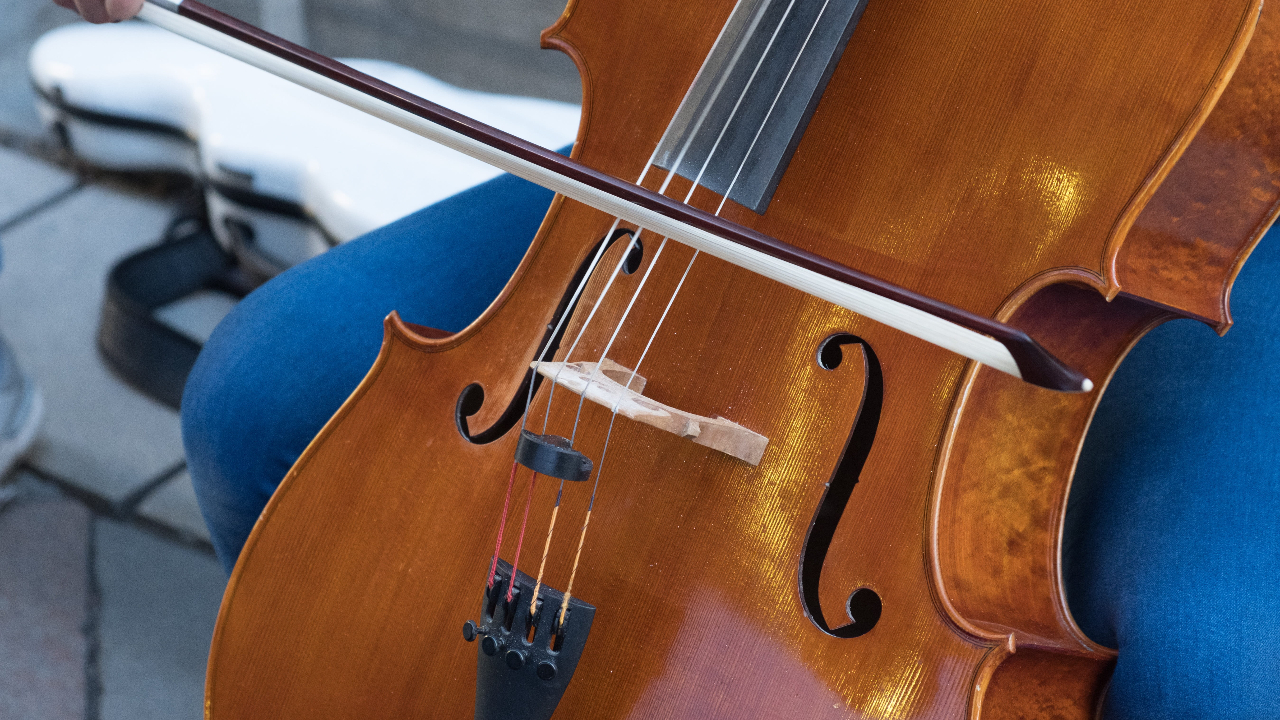
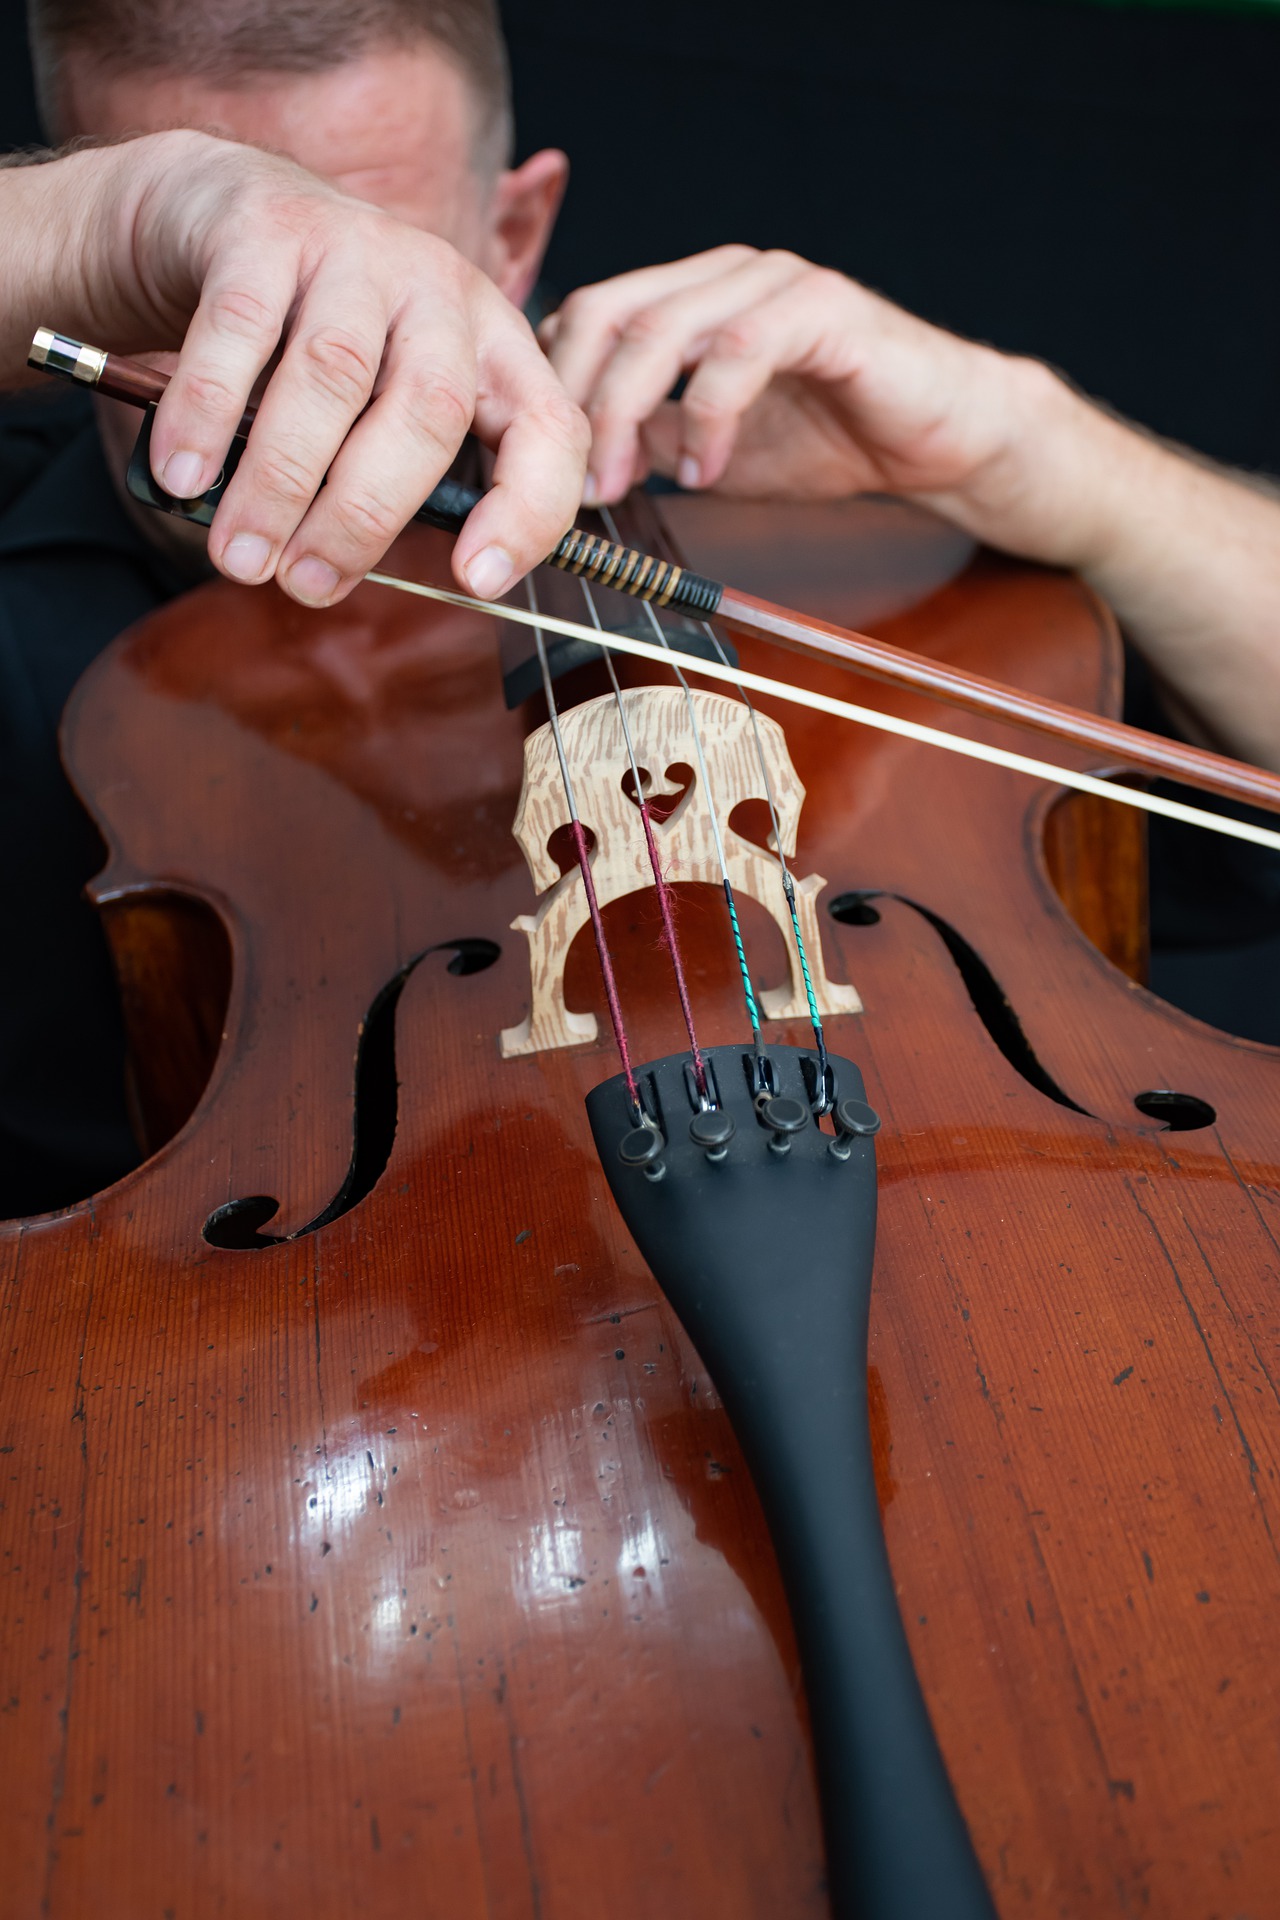
Before you take your bow to your cello for the first time, it’s really important that you tune your cello. You can use an electric tuner, or you can use an app on your phone to help you tune your instrument. You can use the tuning keys to tune your cello. Adjust your strings based on whether the tuner is reading that your instruments are sharp or flat. Be sure to consistently hit each string as your tuning it, as this will ensure all of your strings are properly tuned.
First, you want to start off with a C, which is the thickest string on the cello. You can find this on the right and the cello. Don’t press any strings down as your tuning this note. Next, you’ll move on to G, which is the second string from your right. Then, you’ll tune the open D string, followed by the open A string (the thinnest string, located on the left of the cello). You shouldn’t press any of the strings when you’re tuning them.
It’s Bow Time, Baby
Now for the most exciting part of learning how to play your cello. You get to hold your bow. I don’t know; I really felt like it was such a huge milestone for myself when I was able to move on from tuning my cello to actually holding the bow for the first time.
First, make sure you tighten up the hairs on your bow. This isn’t something that anybody ever talks about, but you really need to make sure that you tighten the bow hairs. If you don’t, the bow hairs will actually be too loose and not play very well on your cello. But, it’s really important that you don’t tighten your hairs too tightly. If you do tighten the hairs on your cello bow too tightly, it can actually break the hairs of the bow. Then, you’ll have to buy a whole new bow – it’s a mess.
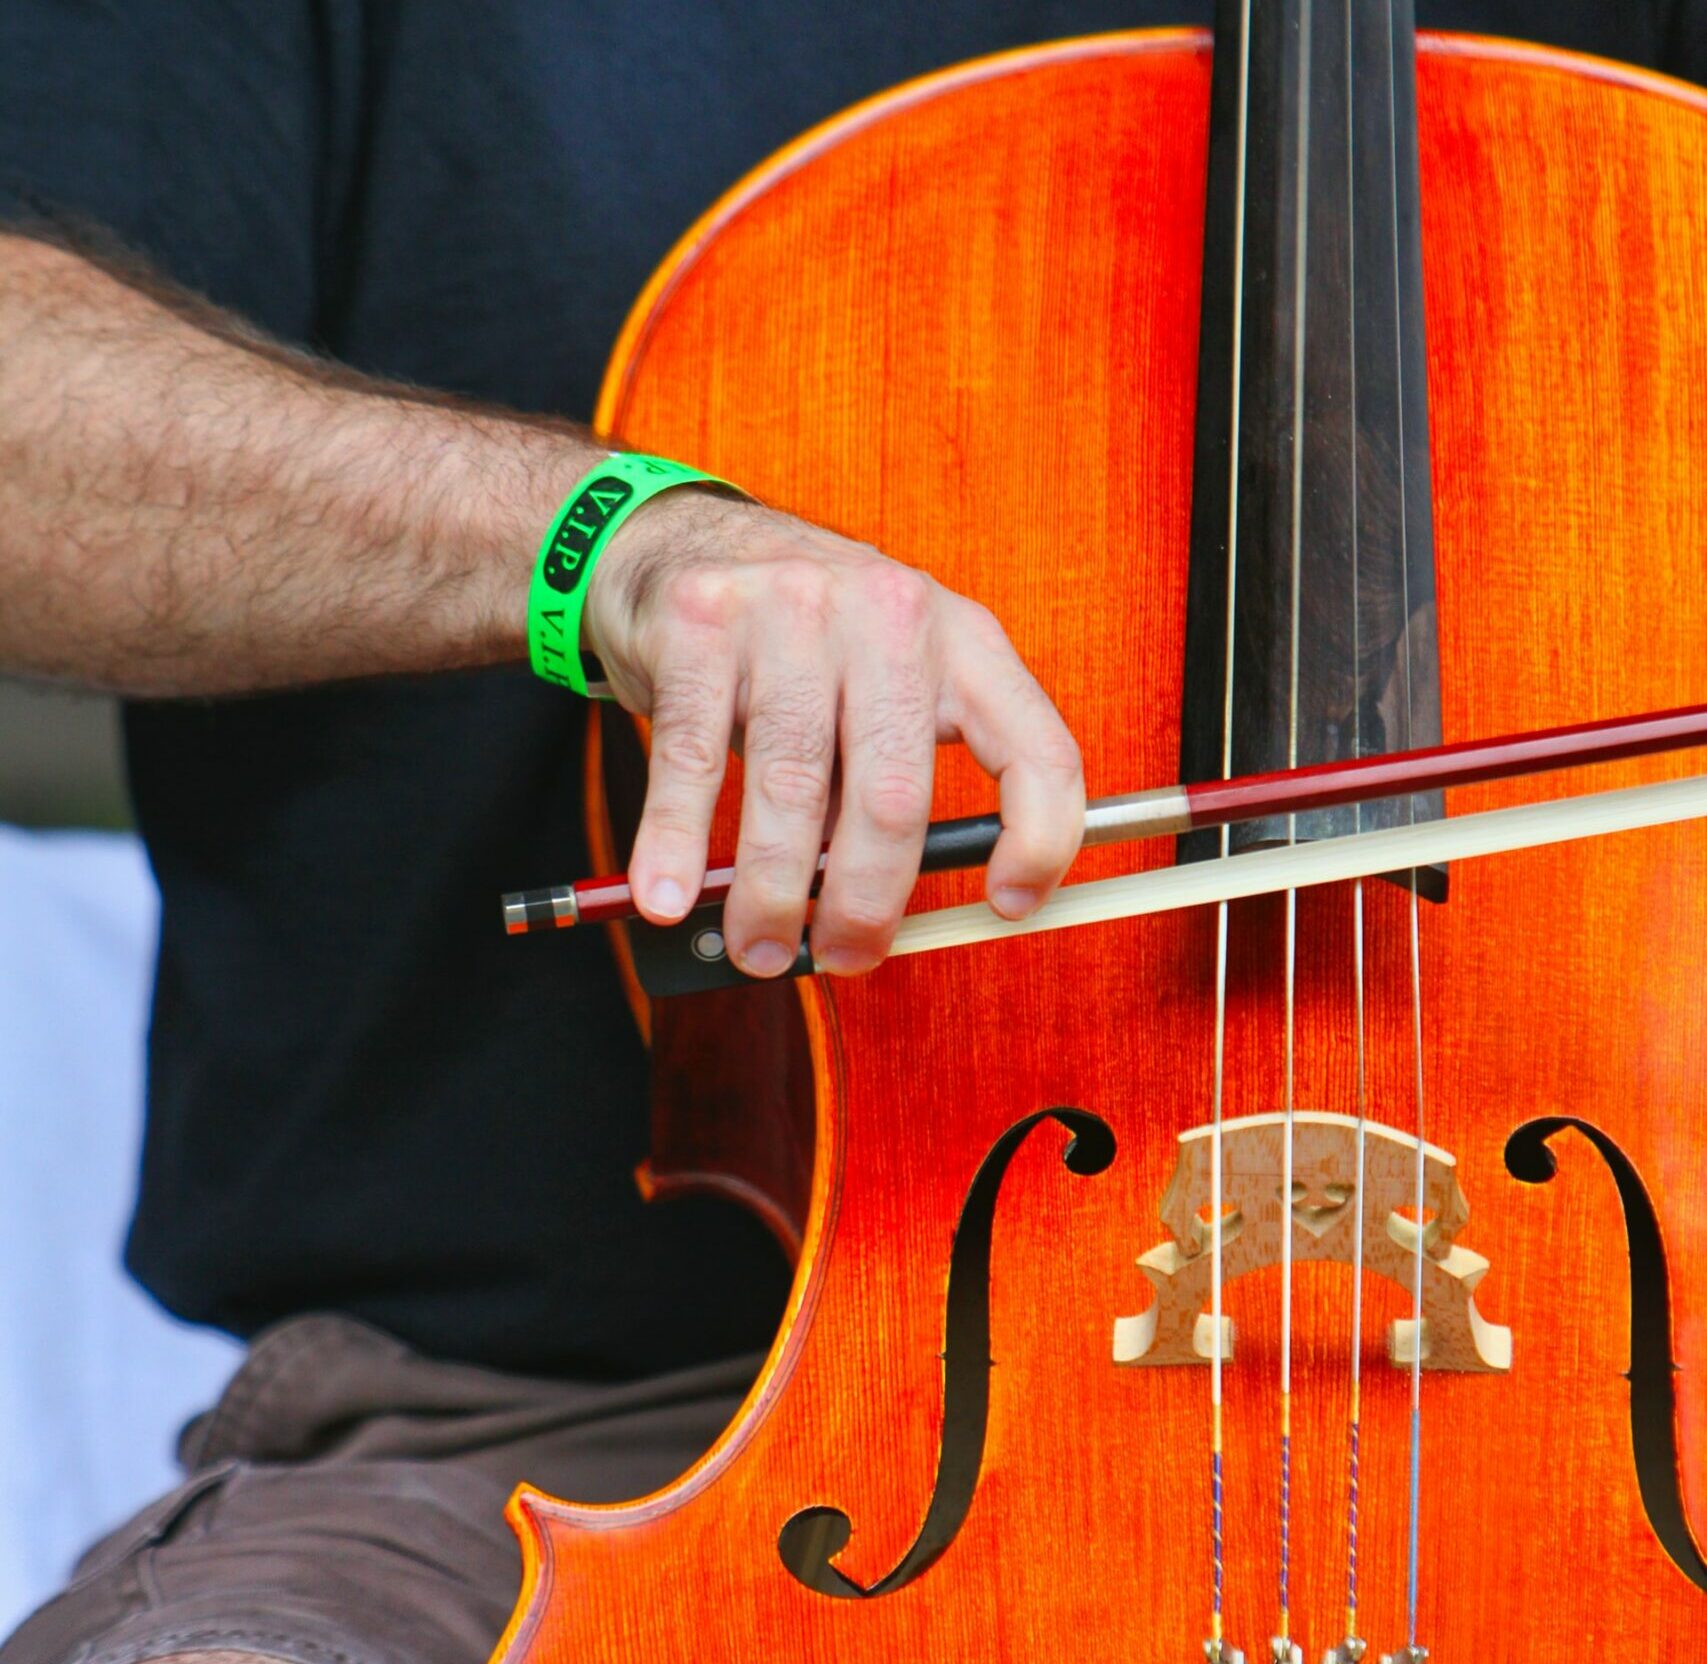
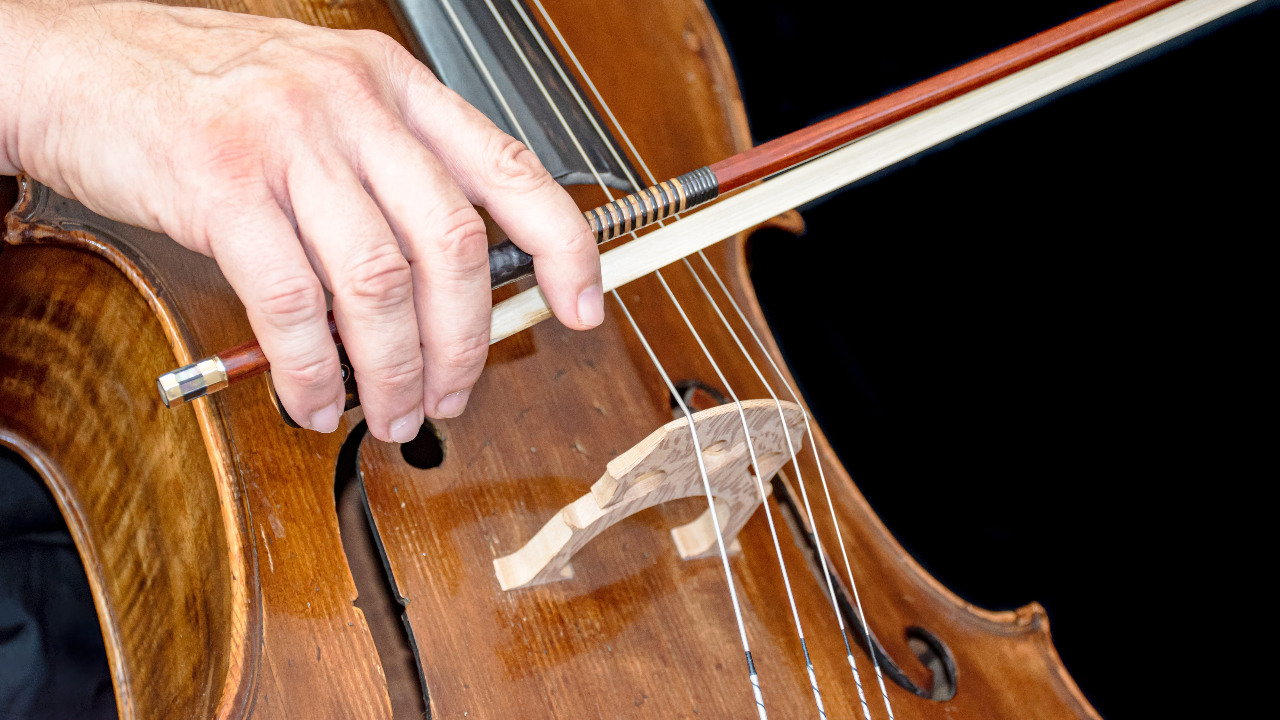
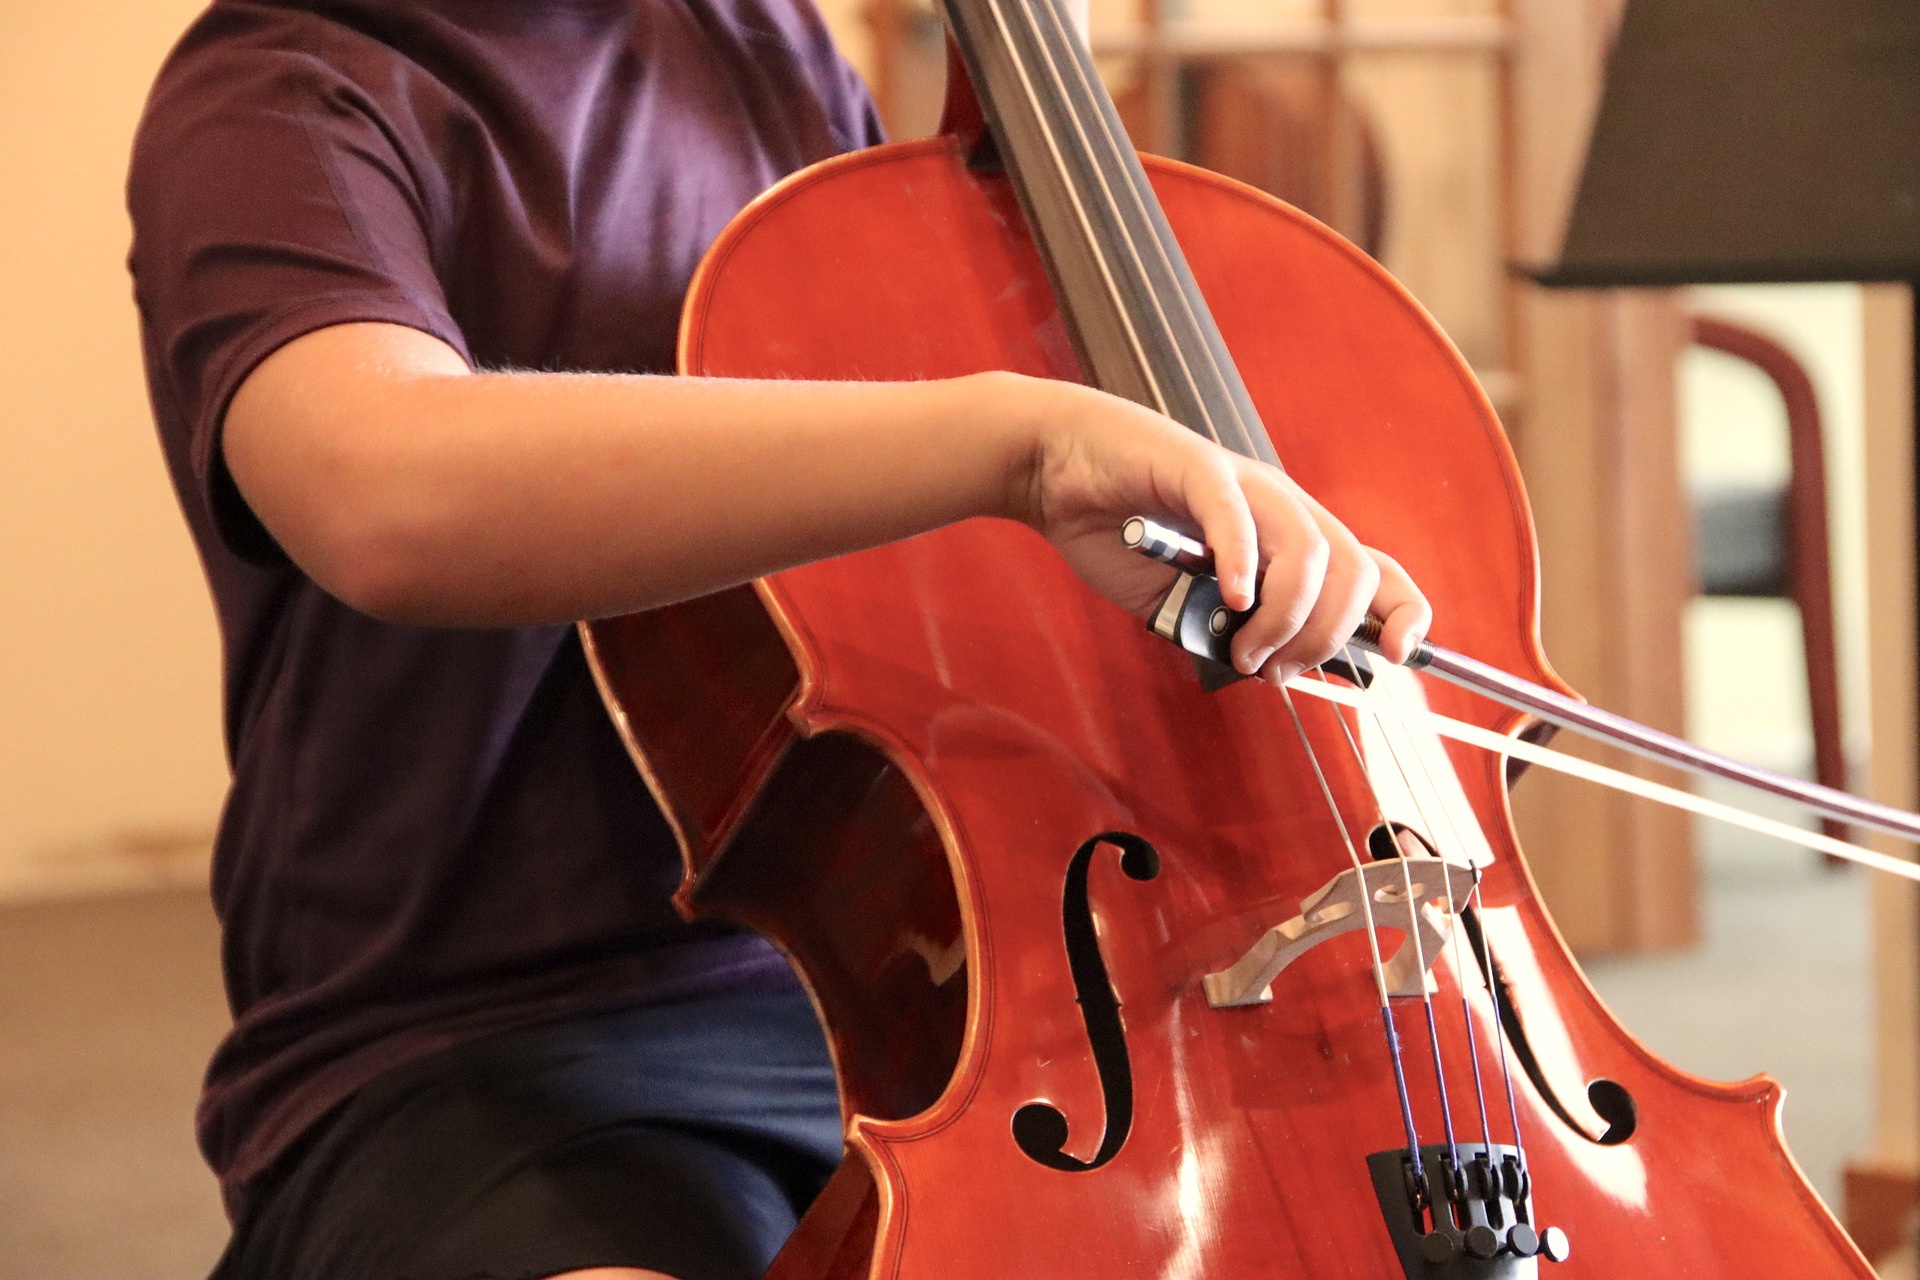
When you go to hold the bow for the first time, make sure that you’re holding the bow in between your thumb and your first three fingers on your right hand. Make sure that the hair of the bow is facing downwards and you have the end of the bow in your fingers. Your hands and your arm should feel relaxed as you’re holding the bow. I really want you to think about holding the bow as an extension onto your right hand and nothing more.
Then, you’ll place the bow on a string that’s halfway in between the finger (where the fingers on your left hand are) and the bridge. You can gently press the hair all the cello bow down on the string. Next, gently apply pressure on the string and begin to move the bow across the string. You’ll want to move the bow side to side (or parallel) to make a sound on your cello.
If you want to experiment for a little bit, this is a great time to do so. If you want to play louder on your cello, add a bit more pressure. If you want to play softer, use less pressure. Make sure to really use your elbow to move the bow back and forth on the cello and not your wrist or bicep.
Extra Tips to Improve Your Playing
Now that you have a basic understanding of how to play the cello, I wanted to throw in a few extra tips to help you understand how to improve your playing. Depending on your overall experience playing musical instruments and your skill level, you may be able to play a few basic songs after this guide. But, I don’t want to set the expectation too high for you.
I know that I said it once before, but I really want you to keep in mind that you shouldn’t expect to be good at playing at cello eyes are starting. Playing a string instrument is tricky, so expect to take some time to get used to playing the instruments and all the tones that your cello is capable of producing. However, in the meantime, there are a few additional things that you can do to improve your playing.
Stop Locking Your Thumb
This is the most common mistake but I see a lot of beginner cello players make. The first thing that I see people do is to lock up their thumb. Try sticking your hands out and moving your thumb, in an attempt to count how many joints are in your thumb it. If you only found that there are two joints located in your thumb, don’t worry: you’re like most people who are starting to learn how to play the cello.
The thumb actually has three joints (the CMC join, MP join, and IP joint). Loosening up your father and relaxing the muscles around your son will help you to unlock this third joint. By unlocking this third joint, you’ll have a much easier time fluidly playing the cello. Just understanding this basic way to improve the fluidity in your bowel movements will make a huge difference in your overall technique.
Use a Fingering Chart
There is literally no shame in carrying a fingering chart around with you everywhere you go. You can start studying a fingering chart to help you get a better understanding of the different notes you can play on the cello. That’s why I really think that also playing scales is such an important part of learning how to successfully play the cello.
Get Connected with a Mentor
I would love to tell you that you’d be able to completely learn how to play the cello by yourself. But, this isn’t true. I would highly recommend that you connect with a mentor. This can mean a few different things, so don’t panic just yet.
If you’re looking to learn how to play the cello because you’re looking to help your child, I would recommend that you look at your child’s school to see if their music teacher offers cello lessons. If the music teacher doesn’t offer private cello lessons, they may know somebody in the area that does offer private cello lessons.
Or, you can connect with a colleague who knows how to play the cello. There may be people in your area that are selling their time with cello lessons, so this is always something you could look into if you’re interested.
If You really don’t have the money for private cello lessons right now, that’s totally okay too. You could always take a trip on YouTube to see what cello lessons are available to help you in a specific area. For example, if you’re really struggling to figure out how to properly tune your cello, look up training lessons for the cello. You’ll be amazed at how much information you can find for free on YouTube.
Properly Maintain Your Cello
For you to ensure that you’re able to produce quality sound out of your cello, it’s also important that you stay on top of proper maintenance. If you really want to get the most mileage out of your cello, you need to make sure that you’re staying up with healthy habits right as you’re starting. Even after your first practice session, you need to make sure that you’re maintaining your cello.
The first thing that I want you to do is to take care of your cello bow. You should release the bow hair on your cello bow after you’ve finished playing. You can do this by loosening up the screw on the cello bow a few times to release the tension on the hairs. After that, you can wipe down the strings and the instrument with any cleaning cloth that comes with your instrument. If you didn’t have a cleaning cloth that came with the instrument, you could always just use a clean cotton cloth to wipe everything down.
Then, I want you to make sure that you’re putting your cello away properly. Put it back in its case and make sure the case is zipped up. You want to make sure that you rest the case gently, leaning up against the wall or in a corner. Don’t leave your instrument case on the floor, as you could always trip and fall on top of your cello!
Focus on Your Posture
Yes, your posture really does matter. Good posture will have your tendons, muscles, ligaments, and joints all properly aligned, so you aren’t straining when you’re holding onto your instrument. Making sure that you’re putting the least amount of strain on your body is important because it will greatly reduce the risk of you possibly developing an injury as a result of poor posture. Even if the injury is just stiffness, it really does make a huge difference in how easy (or difficult) it is for you to play the cello. Believe me, I’m speaking from experience here!
Don’t Forget Your Scales
You aren’t going to like this piece of advice. But, getting your scales down (and your open string practice down) is vital. Getting these two things down will provide you with the opportunity to focus on the proper placement of your bow and your fingers. Plus, it’ll help you to recognize patterns when you’re playing music later on, which will make it much easier for you to site read.
Your Inspiration Matters
I think that it’s really important that you don’t forget your inspiration as you’re learning how to play the cello. There’s a reason why you wanted to learn how to play the cello. Hold on to that reason and remember it as your practice. Honestly, I would really recommend that you keep it at the front of your mind while practicing. Remembering why you wanted to get started we’ll have to benefit you or when you feel frustrated, and you feel like you want to quit. It’ll help to encourage you to keep pushing on through the frustration!
FAQs
Answer: If you’re excited for your child to learn how to play the cello, that’s great! But you shouldn’t push your child to learn how to play. Your child will begin learning when they’re ready.
You could always start introducing them to cello lessons when they’re very young, starting around 3 years old. But, even if you wait until your child is around 7 years old, there is no harm and waiting. I would only recommend that you introduce your child to learn how to play the cello if they’re interested. If you try to force them to learn how to play, it’s not going to go as planned. Your child really won’t pick up the instrument munch, and they won’t practice a whole lot.
Over time, guitar this isn’t going to pick up the instrument anymore, and you’ll have weights in thousands of dollars in instruments and lessons that went to waste. So, I would really only recommend you have your child start picking up the cello if they show a little bit of Interest.
Answer: You’re never too old to learn how to play the cello. It’s totally possible for you to learn how to play a musical instrument and learn how to play it well, even if you’re late into adulthood. Or, even if you’ve already played cello before and you’re just looking to pick it back up again, There’s still hope for you to learn how to play it. There are tons of benefits to learning how to play the cello as an adult.
Answer: For a lot of people who are beginning to learn how to play the cello that don’t have any prior musical experience, it can take around two years to start learning how to play. After you’ve finished around 5 years of committed practice, a cello player should transition in the intermediate to an advanced role.
However, the timeline for this really depends on a number of factors. One factor that is two pens one is how much time the musician spends practicing. If they already have prior musical experience, it won’t take as much time for a person to learn and successfully Play The Cello.
In addition, the goals that a person has while they’re playing cello also will play a factor. For example, if you’re just learning how to play the cello to play along with popular songs on the radio, you’re not going to need as much time to learn how to master it. Or, if you were learning how to play the cello to become fluent in playing, it’s going to take you a much longer time to learn how to master it. Personally, I don’t think that anyone will ever completely master playing the cello.
Conclusion
Figuring out how to play the cello is tricky; there’s a lot that can go wrong when you’re first learning how to play. But that doesn’t mean that playing the cello is impossible! Thankfully, there are tons of resources out there for beginners to utilize to start learning how to play.
If you’re struggling to figure out what cello to get started on, I would recommend the Cecilio cello. It’s perfect for a beginner, no matter what age. If you’ve got a small child you’re shopping around for, you can just buy one of the smaller models. Plus, it’s super budget-friendly too!
As you’re first learning how to play, I hope that you fall in love with the cello as much as I did. It’s going to be tough at first, but if you stick with it, you’ll eventually get the hang of it. And once you do, you’ll be glad you stuck with it!
Looking for more interesting readings? Check out: