Now she gets to do two things she loves, write and use her music knowledge to enrich other musicians’ lives and help them follow their musical dreams! When she’s not delving into the music world, she spends time writing for various niches like beauty, style, and pet care!
- How to Learn to Play Cello Guide: The Only Guide You Need to Get Started - April 18, 2022
- How to Find the Best Trumpet Tuner - April 14, 2022
- Best Carbon Fiber Violins Guide: Why You Need the Glasser Carbon Composite Violin - April 13, 2022
Learning the clarinet seems pretty easy, right?
I know that at one point in time, I thought it wasn’t going to be that difficult to learn how to play an instrument that was literally a straight stick. I had conquered the saxophone; I had learned how to play the flute, the trombone, and a bunch of other instruments.
To me, the clarinet doesn’t seem like an intimidating instrument at all. But, of course, I was wrong. There are a lot of unique challenges that come with playing the clarinet that I wasn’t prepared for.
It is pretty easy to make a sound on the clarinet.
As a flute player, originally, I didn’t think that I would enjoy playing the clarinet as much as I enjoyed playing my first instrument. But, successfully playing the instrument and truly learning how to play the clarinet the right way was challenging.
So, I doubled down on my focus and began to learn how to play the clarinet. Thankfully, I have had tons of classical training that help me learn how to play the clarinet. Years later, the clarinet is an instrument that I always enjoy picking up, especially around Christmas time. But, there’s so much fun to be had when you learn how to master this instrument.
So, no matter where you’re at in your musical journey, I’m here to help you. Even if you haven’t bought your first clarinet yet, don’t worry; I’m here to help show you how you can successfully begin your journey of playing the clarinet before you even purchase your first instrument. Let’s learn how to play the clarinet together without any further hesitation.
What Type of Clarinet are You Going to Buy?
Do you know that they’re actually ten different types of clarinets? Not a lot of people are aware of this because there are really only two types of clarinets that are commonly seen in symphonic and orchestral settings. The B flat clarinet is the most commonly used, with the second most common option and the E flat clarinet.
Personally, I would only recommend a beginner to start out on a B-flat clarinet. Later on down the road, you could always switch over to playing the bass clarinet or the E flat clarinet. The E flat clarinet plays at a higher pitch than the B-flat clarinet. The bass clarinet please in the same key as the B-flat clarinet, but it’s a lot bigger and plays an octave lower.
A lot of beginner-level bands, such as elementary School bands, will only feature musical pieces that have a B-flat clarinet. So, if you aren’t exactly sure what type of clarinet you should start out playing, I personally would recommend that you only consider playing the B-flat clarinet.
First and Foremost – Your Instrument
Of course, you can’t learn how to play the clarinet if you don’t actually have a quick minute to start learning on. That’s why it’s so important for you to take a little bit of time to do some research to see what available models are both in your budget and worth the investment.
I wouldn’t recommend you begin learning how to play the clarinet on a used instrument. Personally, I believe that just opens up a whole door for trouble.
Used clarinets do happen to be a lot cheaper than brand new ones. But, the thing with used clarinets is you don’t know their personal history. Just like you want to get to know someone’s history before you start dating them, you want to get to know the history of the clarinet you’re getting ready to start learning on.
And there is no better way to learn an instrument’s history than by buying a brand new instrument. This ensures that there isn’t any history for you to worry about.
With a used or vintage clarinet, you don’t know who owned the instrument before you did. With that said, you also don’t know if the previous owner took proper precautions to practice regular maintenance with the clarinet. So, suppose you do end up buying a used model.
In that case, you may end up having to turn around and invest a couple hundred dollars just in repairs to get the clarinet to just work for you. This doesn’t even ensure that you’re getting your hands on a quality instrument that would even be worth the several hundred dollars that you just invested in it in repairs.
The safest way around this is to buy a new clarinet. A lot of people will panic at the thought of buying a new clarinet. That’s because a lot of people tend to think that a new clarinet is going to cost them an arm and a leg.
But, this isn’t entirely true.
Thankfully, there are a lot of beginner-friendly models out there that don’t require a huge out-of-pocket cost to invest in. I’m going to head, and I’ve made a list of some of my favorite beginner-friendly models so you don’t have to worry about finding the best option for yourself.
Plus, you’ll need to consider if you want to play the B-flat clarinet or an E-flat clarinet. You’ll also need to decide if you wish to play with a plastic clarinet or a wooden clarinet. Wooden clarinets tend to have a much better sound. But they’re a lot more costly.
A plastic clarinet is a great option for someone who isn’t sure they’re going to be sticking with playing the clarinet since it’s much cheaper of an option.
Mendini MCT-E Black Bb Clarinet
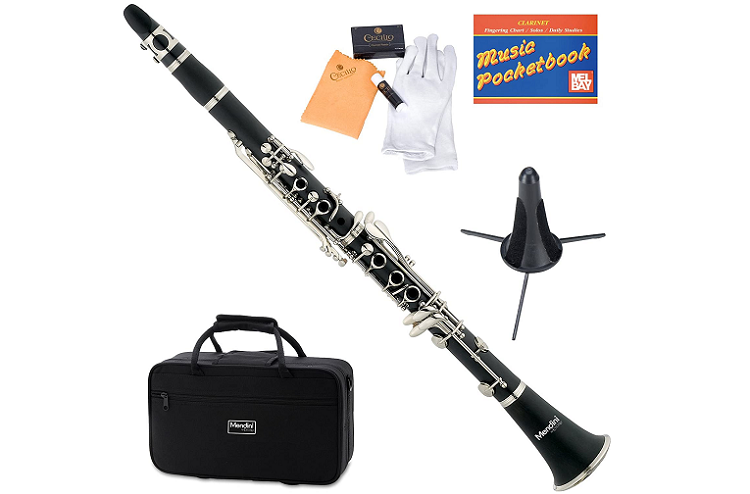
Out of all of the clear none options in this place, this is the clarinet that I would recommend the most. The Mendini by Cecilio B-flat clarinet comes with everything that you need to start learning how to play the clarinet. You’ll find a clarinet stand, maintenance supplies, cork grease, a fingering chart, your clarinet, and a case. That’s really all you need to get started!
I think this is the best model for a beginner because of the affordability of the instrument. Plus, it’s super durable! On this clarinet, you’ll find that there are adjustable thumb rest and nickel-plated keys. I think the nickel-plated keys make this clarinet look sleek and smooth, which isn’t something that you always find on beginner-level clarinet.
Plus, the sound that comes out of this clarinet is so pretty. I think that it creates a really great standard for a new musician in terms of quality, especially if you want to advance to an intermediate or professional level clarinet later down the road.
I think that this is a great clarinet for younger children, too, because of all of the fun colors. You can choose between green, black, blue, sky blue, Rosewood, pink, red, and white. Having different color options for the clarinet to come in may make this instrument a lot more exciting for a beginner.
Montreux Student Clarinet

A lot of people will probably tell you to start off with a Yamaha, but honestly, there are a lot of student-grade Yamaha models that are pretty pricey. I wouldn’t recommend you invest in a Yamaha if you’ve got a young child who wants to learn how to play the clarinet; you never know if they’ll stick with playing.
This student-grade clarinet will allow you to invest in a quality instrument but isn’t going to put as much of a financial strain on it your pockets as a Yamaha or other name brand would. This student clarinet comes with a bag to keep the instrument protected.
It does not come with any of the additional accessories that would be needed to care for the instrument, so this is something that you would have to purchase separately. But, I found that when I picked up his clear not to try it out, it actually had a surprisingly responsive and warm tone.
I also felt like it was super lightweight. And due to the ABS body, I know that this instrument is pretty durable as well. Overall, it’s actually a pretty good student clarinet compared to what some other models may be charging you.
Yamaha YCL-255 Standard Bb Clarinet
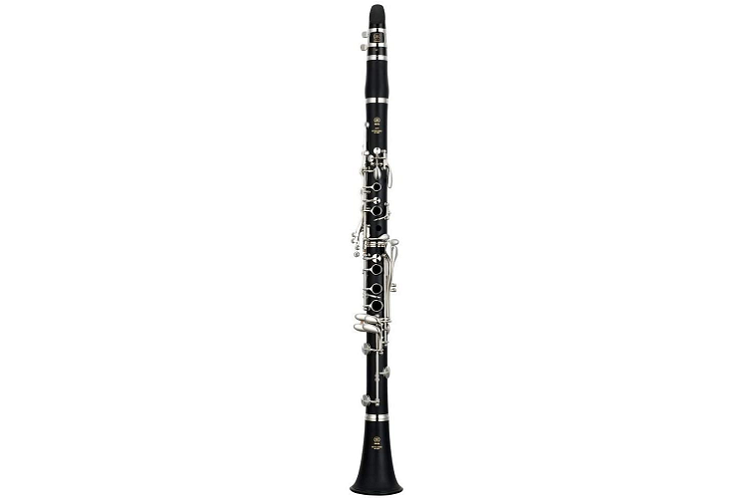
Even if you haven’t ever been involved in the music industry before, You’ve likely heard of the brand Yamaha. Yamaha is well known for making high-quality musical instruments.
I love the most about Yamaha because they don’t just cater to one group of people. Even if you are a complete beginner, you can still get your hands on an instrument from Yamaha; you’ll quickly see why Yamaha is best known for its quality and attention to detail.
Yamaha recently updated this standard B-flat clarinet, so you may find that your model looks a little bit different than a friend who has previously purchased this model of clarinet. You’ll find that this B-flat clarinet comes with an ABS and matte body, which I personally think is super gorgeous.
Another feature that I really love on this B flat clarinet is that it comes with an adjustable rest. This is only something that I’ve seen on higher-end clarinet models, so the fact that it’s on the beginner model is amazing.
In addition, you will also receive a CL-4C mouthpiece with this clarinet. It even mimics the sound and tone that you get from wooden clarinet for you’ll find that it has a very warm and smooth tone. Even though this is a very affordable beginner model, I really think that there’s a lot that this planet has to offer that could easily compete with a professional-grade instrument.
This clarinet comes with a neck strap ring. Like you would wear a neck strap for a saxophone, you can throw an extra pain this clarinet, and it’ll help to take some of the weight that comes with holding your instrument off of your thumb.
And just because I’m listing off all of these fancy features doesn’t mean that this clarinet isn’t a good option for someone who has smaller hands. Personally, that’s another reason why I think this instrument is great for beginners, even though it is a little bit pricier than other models on this list.
I think that if you would invest in this clarinet, you’re not going to have to buy another, more advanced instrument, for a few years. You can really grow with this clarinet for many years.
Don’t Forget a Good Book
Even if you know that you’re going to work alongside someone to help teach you the clarinet, I would still recommend that you invest in a good book. Even as you’re learning new notes and feel confident to take on challenging pieces, having a good workbook will really help introduce you to new tips and tricks to improve your playing style.
Workbooks will create fun lessons to teach you new fingerings, new playing styles and help you troubleshoot some problems that you may run into as you’re learning.
Personally, I would recommend the Rubank Elementary Method workout. This was the first-ever workbook that I used as I was learning how to play the flute, and I fell in love with the teaching style inside of this workbook.
This is a workbook that I lean on using as I learn how to play new instruments and is always a workbook that I recommend to anyone interested in learning how to play a new instrument.
Assembling your Clarinet
Before you figure out how to make noise on your clarinet, you’ll need to figure out how to hold it. And before you learn how to hold it, you’ll need to learn how to put it together. I know that it can seem really overwhelming at first, but after reading through this guide, you’ll be on your way to playing the clarinet in no time. Don’t worry; I’m here to help you through it all.
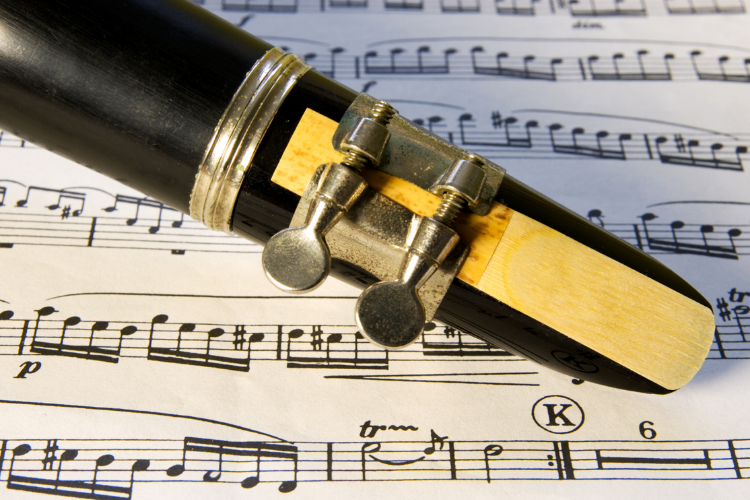
You’ll need to make sure that you have a reed before you begin playing your clarinet. As you’re beginning to put your clarinet together, you’ll need to put your reed in your mouth.
Make sure that you get half of the reed nice and wet before you put it on the mouthpiece. You’ll need to suck on your reed as you’re putting together your clarinet; you can’t make any sound with a dry reed.
There’s also a mouthpiece and a ligature, which is what holds the reed to the mouthpiece. You can put your ligature on forwards or backward; it’s all up to you.
You’ll then want to put the mouthpiece onto the barrel of the clarinet. The barrel flares out at the bottom; you’ll put the mouthpiece at the thinner part of the top.
The wider part of the barrel goes onto the first middle joint. The flat part of the mouthpiece should line up with the back of the clarinet. You can identify the front of the clarinet by the location of all of the keys; the keys are always facing frontward.
Then, you’ll want to connect the two middle joints together. You’ll want to be sure to apply cork grease before you connect the two pieces together. Then, you’ll put the bell of the clarinet on the instrument. After you’ve connected everything together, you’ll put your reed on the clarinet.
As you’re putting on the reed, make sure you live a fingernail length in between the top part of the mouthpiece and the reed. There should be a little bit of the mouthpiece showing on top of the reed. Screw on the ligature, and you’re all set!
You shouldn’t screw the ligature on too tightly. Make sure you’re still able to screw and unscrew the ligature without too much trouble.
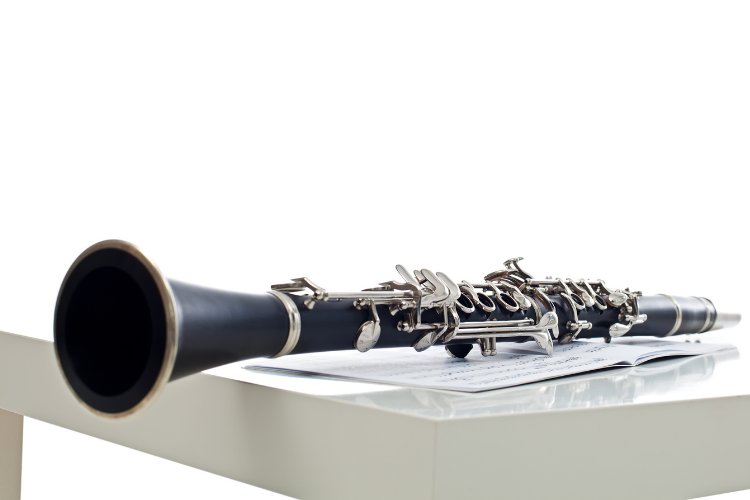
An Introduction to the Body of Your Clarinet
Have you ever heard this song called ‘Your Body Is a Wonderland’?
Well, the body of the clarinet is a wonderland. It can honestly look really intimidating because of all of the different buttons and keys on it. Now that you’ve put it all together, let’s get more familiar with the instrument.
If you take a look at your clarinet, you’ll find that your clarinet has 24 holes. These holes are closed by triggering keys that you press with 9 fingers. Your tent finger, which is the thumb on your right hand, is actually supporting most of the weight on the clarinet.
Honestly, this was the hardest part for me when it came to playing the clarinet. As a flute player originally, I actually found that the weight of the clarinet ended up hurting my hands. My hands were sore, and my thumb felt like it was going to fall off my finger for a little bit.
Yes, that is me being overdramatic. But my thumb did hurt.
Moving on, the upper part of your clarinet will have nine keys on it. Six of the keys will be at the bottom of the clarinet, one will be located on the back, and two will be found on the top. The F key is located at the back of your instrument is referred to as the 12th key. The purpose of the 12th key is to allow you to play in a higher register.
In addition to the 12th key on your body, there are also three rings on your clarinet (to rule them all, haha). The three rings on your clarinet are there to allow you to play in a higher register.
Moving on to the lower part of the body of your clarinet, you’ll find there are eight keys. There are three keys located on top, four keys on the bottom of the clarinet, and a small key located in the middle of the bottom. In addition to all of the keys, you’ll also find that there are three rings.
So, if you spend time counting all of the keys and rings on your clarinet, you’ll find if there are six rings (no, this isn’t an introduction to some Ariana Grande song) and 17 keys.
Personally, I would highly recommend that you get comfortable playing in the lower register of your clarinet instead of the top register. I feel the lower register are a lot easier to get comfortable with than the higher register. There aren’t as many fingering positions in fall in at the lower registers as there are with the higher registers.
And as a beginner, I would highly recommend that you invest in a fingering chart. It’s so worth it to keep on you, even if you just have a picture downloaded to your phone for you to pull up when you aren’t sure of a fingering.
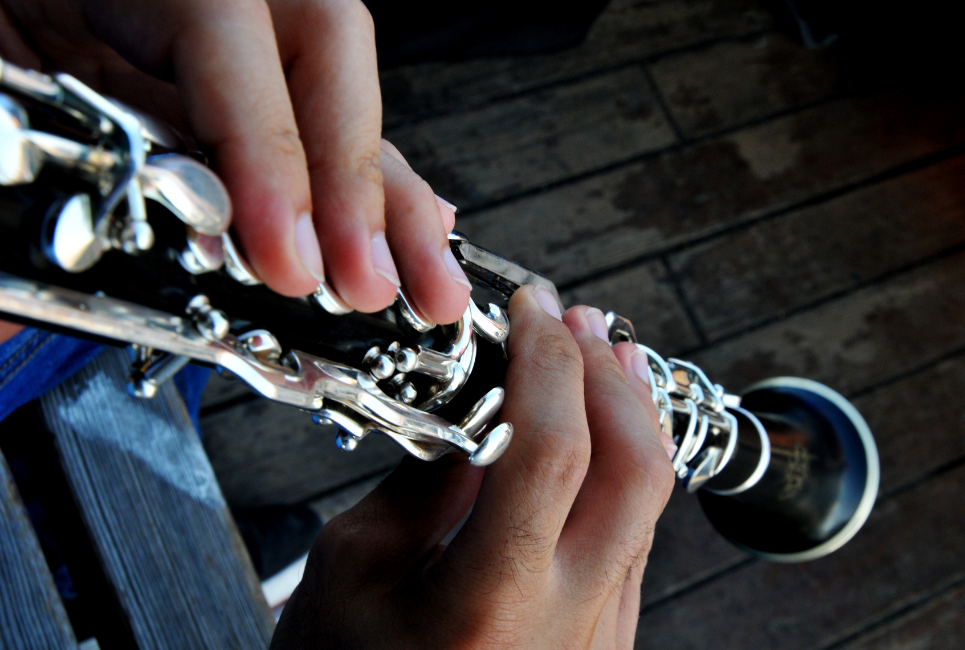
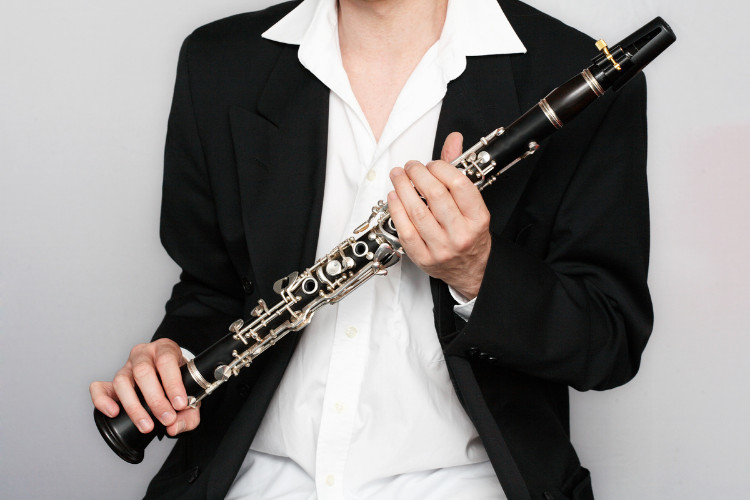
Holding Your Clarinet
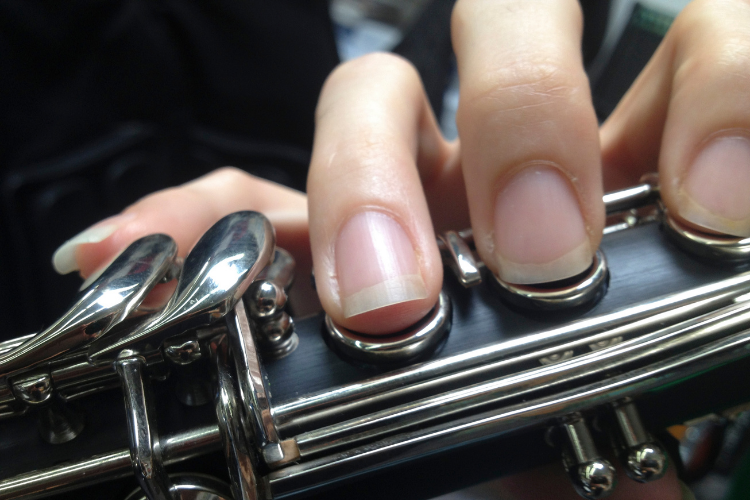
When you’re grabbing your clarinet, you’ll want to make a “C” shape with your hands. The pads of your fingers should go directly overtop of the keyholes. You won’t want spaces between your fingers and the holes on your keys; otherwise, your clarinet will start to squeak. You’ll want to avoid a squeaky clarinet!
Plus, it’s important for you to hold your clarinet at the right angle. If you don’t hold your clarinet at the right angle, it can cause a disruption in your sound. Instead of your clarinet sound and clear and smooth, it can cause your instrument to run sharp and even create squeaking noises.
Suppose you’re really struggling to make a great tone with your clarinet. In that case, I recommend holding your clarinet at a different angle. You can start by holding your clarinet 45 degrees away from your body. You shouldn’t have your clarinet flat against your stomach when you’re playing.
Also, make sure that you’re sitting up straight and practicing proper posture. You should also feel relaxed, so don’t feel like you need to set up so straight that you feel very uncomfortable.
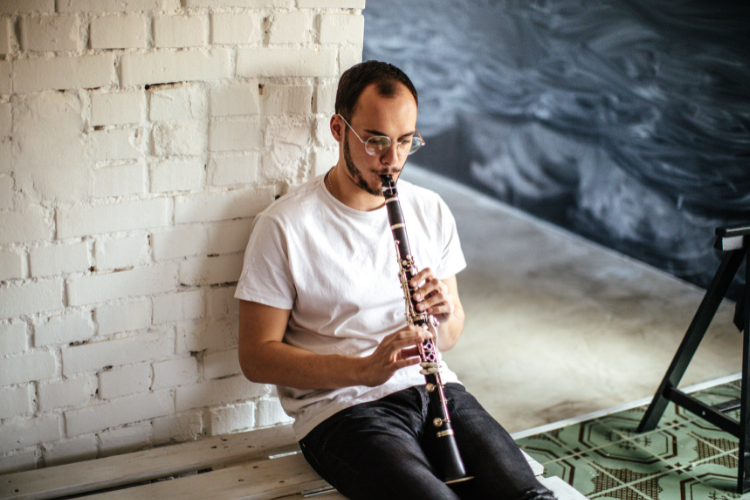
How to Make Sound with Your Clarinet
If you don’t already know, the clarinet is a type of woodwind. With a woodwind instrument, you have to blow through the mouthpiece of the clarinet to produce a sound. The sound that you produce is greatly affected by your embouchure, which we will talk more about later. You’ll blow into the mouthpiece of your clarinet to produce sound.
To start making sounds out of your clarinet, you need to know how to put your mouth on the instrument. First, you’ll want to focus on your embouchure. There may be some beginner websites that are helping you to learn how to play clarinet that tell you to worry about your embouchure later on down the road. But, this isn’t a good way to start off your clarinet Journey.
As you’re learning how to play the clarinet, I would highly recommend that you keep close attention and focus on your bottom lip and your throat. As you’re learning how to play, you don’t want to put too much of your bottom lip on your reed.
Also, you want to make sure that your throat isn’t too closed as you’re playing the clarinet, as this will severely impact your sound.
Honestly, the best way that I can tell you how to hold your reeds is to rest your bottom lip against your teeth. Your chin should feel flat, and your mouth should feel comfortable for you to place the mouthpiece of the clarinet on your bottom lip.
Next, you want to close your flips over the top of the reed. Closing your lips around the reed will just keep the air that’s in your mouth.
By using this technique as the proper way to keep the right amount of pressure on your clarinet reed, you’ll easily be able to produce sound out of your clarinet. In addition, you shouldn’t puff out your cheeks as you’re playing your clarinet. Always focus on blowing down.
However, if you’re still having trouble with your embouchure, try practicing this method for a little bit. You can just practice placing your lips on the reed of the instrument without actually having to make any sound.
Don’t get frustrated if this takes you a little bit to figure out. Practice makes perfect, and it’s better to get this figured out now than struggle with your embouchure later down the road.
You should only have the tip of your tongue striking against the mouthpiece and reed. If you have your whole tongue against the reed, it’ll make it difficult for you to play quickly. Playing with your tongue against the tip is a lot easier!
You should be making a “too” sound instead of a “tha” sound. The “too” sound is a lot lighter and isn’t as difficult for your tongue to articulate.
How to Improve Your Sound

Now that you’ve gotten a better idea of how to actually make noise on your clarinet, it’s time for us to focus on how to improve your sound. You don’t have to wait to have years of experience underneath your belt before making a sound that you’re actually proud of.
Instead, there are some small changes that you can make in your playing style that will allow you to sound like a brand-new musician.
Focus on Your Reed Choice
First, I would highly recommend that you make sure that you know where your Reeds came from. If you just happen to use the reeds that came with your clarinet pit, you may happen to be using low-quality or off-brand reeds.
Personally, I would only use name-brand reeds. This is because name brand reeds are well-known because of their quality. But that’s not all that I have to say about Reed’s either.
As a beginner, you’re more than likely playing on a reed that’s a 1 or a 1 1/2. However, I would recommend that you consider moving up your wreath size to a 2 or a 2 1/2 once you’ve gotten a better hang of your instrument.
Also, you need to consider taking proper care of your reeds before you begin using them. For example, not a lot of beginners are aware that you should actually soak your reeds before you begin using them.
So, if you got a box of brand-new reed’s that you haven’t yet used, make a cup of water that’s lukewarm. You should soak your reed in the water before playing your clarinet for about 5 minutes. You could even soak the entire box of reeds before you begin playing. This will give you time to play around with the different breeds in the box to see which one sounds the best.
After you flip the reeds soak in the water, you can put them back in the box, after you’ve patted them dry. One of the trickiest parts about playing the clarinet, or any reed instrument, is that boxes of reeds will usually only have a good reed or two in them.
I wouldn’t recommend that you throw the lower-quality reeds out. Instead, they’re good reeds to use when you’re practicing. You can save the other reeds for any performances.
Make Sure You Have a Quality Clarinet
Next, I would highly recommend that you make sure that you have a decent clarinet. Suppose you’re serious about learning how to play the clarinet. A lot of people are learning how to play the clarinet to practice in an orchestra or a band. In that case, it doesn’t make sense to waste your time learning how to play on a low-quality clarinet.
If you haven’t spent a whole lot of money on your clarinet or you happen to be using a clear not that’s been passed around the family, I would consider looking into another model.
Buying a new clarinet, even if it is a student model, will provide you with a good quality sound. Plus, the upkeep will be a lot easier than if you were to use a used clarinet.
As the owner of a brand new clarinet, you’ll be aware of the history of your instrument, meaning you won’t have to worry about any surprise damage that could have affected the integrity of your instrument over the years.
You don’t need to buy a top-of-the-line instrument if you’re getting started. Just consider buying a newer model if you only have used options available to you.
Start Off Easy
I know whenever I pick up a new instrument, I always get really excited to play a piece that I know and love on the new insurance. But, this isn’t a good idea to always do. It’s easy to get overwhelmed with your new instrument this way. I don’t have any shame and starting off with the basics, even as a musician with more than 10 years of classical training.
Sometimes, the basic songs that you can learn, like Hot Cross Buns will help get you through more challenging pieces as you become more advanced. It’s all about the technique you’re learning right now, not how to show off.
I would highly recommend that you just practice making noise in your clarinet. So, don’t try to figure out the best song; I free you to start learning how to play it first. Instead, I would only recommend that you play in open G as you’re getting used to your instrument.
Suppose you are someone that already has musical experience. In that case, you may not need to spend as much time playing on open G as someone who doesn’t have musical experience.
But, don’t be ashamed of how much time it takes you to plan open G. There is no rush when it comes to music. You want to make sure that you start off with a solid understanding of the basics. That way, you don’t have to go back and relearn anything later down the road.
Air is Essential
Yes, we need air to breathe, but in terms of music, having proper air support is essential. While the clarinet may seem like a small instrument, that’s doesn’t mean that it doesn’t need lots of air to support the best sound you can get out of your instrument.
You could ensure that you’re getting enough air for your insurance by properly sitting when you’re playing. To sit properly while you’re playing, you’ll want to sit with your back straight and your shoulders forward.
This will ensure that your lungs can completely fill without your poor posture stopping them from doing so. Over time, making sure that you sit with good posture will ensure that your lungs can grow over time.
As you’re breathing to support your clarinet, I would highly recommend that you breathe as deep as you can. Try to start filling your lungs from the bottom up to ensure that you’re getting enough air to support your instrument. You should always try to breathe from your stomach a knot your throat, as this will ensure that you’re getting enough sleep to support your instrument without hyperventilating.
Create a Practice Schedule
It’s important for you to create a consistent practice schedule. There’s no way you can improve if you don’t make a consistent schedule. While life can get pretty busy, it’s important for you to carve out a consistent schedule in your week for you to practice. I know how annoying the saying is, but it’s true: practice makes perfect.
During your practice, you can focus on improving your embouchure, improving your sound, working on your breathing, and Learning how to control your airstream. In the beginning, you only have to worry about learning how to position your read on your mouthpiece so that you can easily flick your tongue against the tip of the mouthpiece.
Focus on Your Technique
The technique you bring when you’re playing the clarinet is the foundation of your entire musical journey. If you don’t develop good technique while you’re a beginner, you’ll continue to struggle as you move on to more advanced pieces. And as you move on to more advanced pieces, you’ll realize how important proper technique is to articulating certain styles of music.
I would recommend that you spend a lot of time improving your technique as your first starting out.
The first thing that I would recommend is to ensure your reed properly fits onto your mouthpiece. If you have are that’s too big or too small, it’ll make it difficult for your tongue to articulate against the mouthpiece.
After you’ve ensured that your read properly fits your mouthpiece, you can begin to improve upon your lung capacity. The most common mistake a lot of beginner clarinet players make at the beginning to play music is they don’t focus on improving the flow by monitoring where they’re breathing in phasing.
Working on your lung capacity now will make it easier for you to develop a flow of your music as you begin to play more advanced pieces.
Next, I would also recommend that you work on improving your scale and arpeggio confidence. Scales and arpeggios help your fingers to recognize patterns, which will translate as you’re beginning to play new pieces.
By working on improving your scales and arpeggios as a beginner, you will have an easier time playing through faster pieces as you advance. Plus, it’ll improve the flexibility of your fingers, which will make it easier for you to play pieces at a faster tempo.
Last week, I would also recommend that you will practice mouth exercises to strengthen your bottom lip. Just taking a few minutes out of each practice session at to focus on improving these small pieces in your technique will really translate to a huge improvement in your capabilities later on down the road.
FAQs
Answer: Learning the clarinet can be a challenge, mainly because most of it is an intellectual challenge. Keep in mind that as you learn how to play the clarinet, you will need to spend a lot of time practicing.
You’ll probably have to spend even more time practicing if you don’t have someone who’s helping you to learn how to play the instrument. I would recommend working with a professional music teacher or someone who has experience playing the clarinet to help you get started.
As you become more comfortable playing your instrument, you won’t need to rely on having someone else help you as much. Having somebody to help teach you to learn how to play the clarinet will help to give you additional tips that a book or a YouTube tutorial won’t provide you with.
Learning the beginning stages of how to play the clarinet can be tricky. Don’t get frustrated. For me, the hardest part is not getting frustrated. The beginning part of learning how to play the clarinet can be very overwhelming and difficult, but mentally prepare yourself for that.
Really focus on your embouchure and how to properly hold your instrument when you’re first starting out. This will all help you later on down the road.
Answer: The first thing that I would recommend is looking for someone who has a background in music. If you have a friend who has a college degree in music, I would recommend you consider talking to them. Hiring someone that has experience playing the clarinet and a background in classical training is essential, especially with the clarinet.
I would also recommend that you talk with a person you’re considering working with. Get a better idea of their background, their expertise, and why they’re passionate about the clarinet.
You could maybe even look to see if any public school teachers offer private lessons. Sometimes, this may be a pricey option, but it’s a good investment if you’re really serious about playing the clarinet.
Answer: Yes! If you’re having trouble putting a clarinet together, cork grease will make it much easier for you to assemble everything. Look in your case to see if you can find any cork grease. I love cork grease; it’s a game-changer. When I’m teaching little kids how to play the clarinet, I always explain to them: it’s like a chapstick but for your clarinet.
When you’re applying cork grease, make sure to only apply a little bit. You don’t want to make it all greasy. You don’t want to put the cork grease on the body of the instrument!
But, you can apply a little bit of cork grease to the cork part of the instrument. When you’re applying the cork grease, put on a light layer. You’ll find when you put the two pieces back together, they fit together much easier!
Conclusion
Hopefully, you have a much better idea of understanding how to begin your journey of learning the clarinet. There are some critical features that you need to know about before you invest in your first clarinet. This is why I would highly recommend you check out our buying guide for a clarinet.
The tips that I’ve listed in this guide will help you to get a better understanding. However, there’s still some more information that you should be aware of before you finalize any purchase.
Out of all the clarinets on this list, I would still highly recommend the Mendini by Cecilio B-flat clarinet. It comes with everything that you need, so you don’t have to spend extra funds and time shopping around for the additional accessory. Overall, this should make your shopping (and playing) journey a lot easier.
Do you have any tips or tricks to help someone else learn how to play the clarinet for the first time?
Looking for more interesting reading? Check out: